MONA LISA’S SKELETON FOUND?

Leonardo Da Vinci’s model for the Mona Lisa may have been found by a research team in Italy who discovered three skeletons in the basement of a old, now unused convent in Florence last year, where Lisa Gherardini likely spent her final months.

 MonaLisaTomb

Photo by http://www.irishtimes.com/news/world/florence-tomb-opened-in-search-for-mona-lisa-1.1490726

Silvano Vinceti, of Italy’s National Committee for Cultural Heritage, said that another tomb in Florence contains relatives of Lisa Gherardini del Giacondo, probably her son Piero, and that, “Right now we are carrying out carbon-14 tests on three of the eight skeletons found in St. Ursula. The carbon-14 test will tell us which of the three dates back to the 1500s. Only then will we know which skeleton to do the final DNA test on.” After that, they plan to do a digital reconstruction of her face.

For more on this story, go to:

http://www.independent.co.uk/news/world/europe/researchers-open-florence-tomb-in-search-for-identity-of-the-real-mona-lisa-8755463.html

For a picture of the skull:

http://www.independent.co.uk/news/science/archaeology/news/the-dig-that-may-have-unearthed-leonardos-muse-8196544.html

Another version of Mona Lisa discovered:

MonaLisaLouvrePrado

photo by http://www.theartnewspaper.com/articles/Earliest-copy-of-Mona-Lisa-found-in-Prado/25514

http://www.independent.co.uk/arts-entertainment/art/news/so-she-truly-was-leonardos-labour-of-love-7645955.html

The Arizona Renaissance Art Guild does one-week workshop intensives three times per year, and in addition, we get together to paint all day on the third Saturday of every month.  If you are in the Phoenix Metro area and are interested in finding out more or possibly joining our colony, please let me know through this blog.  ~Marsha

ARIZONA RENAISSANCE ART GUILD REMINDER

I just want to remind you all that the Arizona Renaissance Art Guild will get together to paint all day from 9:00 – 5:00, this coming Saturday, July 20th, 2013.  If you are in the Phoenix Metro area and are interested in visiting, finding out more, or possibly joining our guild, please let me know through this blog.  It’s free, and you won’t find a friendlier, more helpful group of people to paint with.   ~Marsha

ARCHIVAL, SOLVENT-FREE PAINT LIFE, STAGE 3

I have just completed stage 3 of the sun/stand oil referred to in previous posts (see stages 1 and 2). I had to wait longer than I thought, and just beat the monsoons. We had a dust storm yesterday and about three drops of rain, but I had brought my oil inside by that time. It took three weeks in 112-117 degrees (Can you say “hot?”) instead of the two weeks I anticipated to get the desired thickness.

Remember that linseed oil starts to degrade and break down at about 350 degrees F, and art supply linseed/stand oil is heated to as much as 470 degrees F for expediency, making it a very slow drying oil. My oil might have made it to 120 degrees maximum and the oil traces beautifully, will dry quickly in my artwork, and has the viscosity of warm honey:

StandOilDrip

At first, I thought a funnel would be necessary to get it into my small-mouth bottle, so I lined one with a small Ziplock sandwich bag (corner snipped off), to keep the sticky oil from ruining my funnel:

FunnelStandOil

It turns out that the lip on my bowl poured in a beautiful, dribble-less stream, so I was able to dispense with the funnel idea. I simply poured the new stand oil back into its original linseed oil bottle, using a Q-tip to drag the last of the stand oil out of the bowl and into the bottle–I didn’t want to waste any of the good stuff. I ended up with the bottle half full of good medium after filtering out the moisture and impurities during the prior stages of the refining process.

I can tell you that this oil will do its job extremely well as a binder–I had a very hard time trying to clean it out of the bowl. I first tried olive oil, and then a Scotch Brite scrubber. Neither would budge its strength around the oil line where it had been sitting for weeks. Finally, I soaked the bowl in very hot soapy water and then scraped it off easily with a single-edge razor blade.

You could stop right here with this process and be happy with conventionally using your lovely, perfectly refined stand oil, an “unobtanium” at any art supplier; OR, you can continue with me on the path of adding marble dust, making glair, etc., a process I will be outlining in additional posts.

A great price on “art supplies” like alcohol, nitril gloves, and petroleum jelly can be found at Masune First Aid and Safety, www.masune.com.  An excellent price on a  box of 100, individually wrapped single-edge razor blades can be found on Amazon, http://www.amazon.com/American-Safety-Razor-66-0089-disp-100-Pack/dp/B000KKMY5O/ref=pd_sim_sbs_hi_1

Until next time…

The Arizona Renaissance Art Guild does one-week workshop intensives three times per year, and in addition, we get together to paint all day on the third Saturday of every month.  If you are in the Phoenix Metro area and are interested in finding out more or possibly joining our colony, please let me know through this blog.  ~Marsha

ARCHIVAL, SOLVENT-FREE PAINT LIFE, STAGE 2

Greetings.  I have returned to my blog after much jumping through hoops to upgrade our Internet service, a task that is not always so easy when you live outside a metro, have no access to wireless, and need to climb a mountain and run wire (in conduit so the animals don’t eat it) to receive a signal.  But here I am at last, and my husband and I are very happy to have a new and faster service!

See my first post on this topic, “Archival, Solvent-free…,” dated 5/14/13, where I had experimented with making my own stand oil (Stage 1) by cleaning the mucilage out of it first, from the directions given in Louis Velasquez’s book. My only regret so far is that I did not start with TWO bottles of flaxseed oil instead of just one.  It is now a beautiful linseed oil and I would like to save some of it in it’s present state but, if I do that, I won’t have enough to make very much stand oil (Rewind would be so wonderful).

English: Flax The seeds of flax are used to ma...

English: Flax The seeds of flax are used to make linseed oil. (Photo credit: Wikipedia)

In this post, I put it in the Arizona sun (Stage 2), using Velasquez’s method, to make stand oil that is a faster-drying oil than can be purchased at art supply stores. The commercial stand oil in art stores has been overheated and, as a result, becomes slow-drying.

I expect that, at 108 degrees with less than 10% relative humidity, my oil will not even take two weeks–but we’ll see.  I must do it now to beat the monsoons that usually arrive in early July, because water would be an enemy of this oil.  Here is the process:

Sun-Thicken the Oil to make Stand Oil (aka Sun Oil)

1.  Pour cleansed linseed oil into a white, opaque container to ¾-1” depth (not shallower, or the resulting stand oil will wrinkle the paint badly), NO WATER contamination. Set the dish inside a perimeter of ant powder, if necessary.  I found out the hard way during Stage 1, that some kinds of ants LOVE this oil with a fervor you wouldn’t believe until you’ve see it!

P1070781

2.  Cover to keep out most detritus but leave gap/clearance allowing air circulation—I layered a piece of breathable organza to keep out even the teeny bugs, some screen and then put the lid on partially.  The screen seems to hold the lid up enough, especially with the lid canted.

P1070782P1070783P1070785

3.  Expose oil to direct summer sun as much as possible, stirring briskly for about 30 seconds, twice daily, more frequently in very hot, dry areas.  Stirring aids in the even and complete oxidation of the oil.  I am guessing I’ll have to stir mine twice as often with something small that doesn’t waste too much oil left on the stirrer.

4.  After 15-30 days, depending on location and season, it will thicken, the hotter and dryer the weather, the faster.  Let it thicken to the viscosity you prefer.  The only rule is don’t let it get so thick that it forms a skin or globs that resist stirring.

5.  With a funnel and a cotton ball, filter the oil of dust/insects. It should be clear, palest yellow.  Place a loose cap on the jar as it expands and contracts when in storage as it continues to dry.

6.  IMMEDIATELY CLEAN THE WHITE DISH, using non-solvent thin linseed oil or olive oil to remove the sticky sun oil, wipe, then wash with soapy water. If you fail to do this, it will not come off and you’ll be discarding your otherwise perfectly good and useable dish.

After my Stand Oil is done (hopefully in two weeks), we will continue on to Stage 3 of the process of making what promises to be a most wonderful medium.

The Arizona Renaissance Art Guild does one-week workshop intensives three times per year, and in addition, we get together to paint all day on the third Saturday of every month.  If you are in the Phoenix Metro area and are interested in finding out more or possibly joining our colony, please let me know through this blog.  ~Marsha

EXPERIMENTING WITH MAKING MY PAINTING LIFE FULLY ARCHIVAL, YET SOLVENT-FREE

HOW TO MAKE YOUR PAINTING LIFE SOLVENT-FREE, YET EXCEPTIONALLY ARCHIVAL, JUST LIKE REMBRANDT, VELASQUEZ, RUBENS, AND OTHER OLD MASTERS DID

Last week, I experimented with making my own stand oil (Stage 1) by cleaning the mucilage out of it first, from the directions given in Louis Velasquez’s book. My goal is to put it in the sun (Stage 2) per his instructions to make a faster-drying oil than can be purchased at art supply stores. The kind you buy is overheated and, as a result, becomes slow-drying.

Here is a drastic consolidation of a most information-packed and well-researched book by Louis Velasquez, an esteemed artist and materials researcher.  He is a treasure—unselfish, helpful, and dedicated to authenticity and truth with little regard for how much money he pockets.  The book is dense with information, so I have made its most salient points more accessible in this greatly abbreviated synopsis.  He provides copius amounts of free information on his website, and you can order the very reasonably priced book from Louis Velasquez’s website at http://www.calcitesunoil.com to begin your solvent-free, OM archival-quality painting life.

VelasquezBookCover

Isolating the Support, Primers

The Old Masters isolated the absorbent wood with a glue size before they applied the gesso, because wood is porous and absorbs water like a sponge.  And you can’t apply gesso directly on unsized wood because it is made with PVA which just soaks into the wood.  Experiments show that acrylic gesso is very absorbent and needs to be sealed before we paint on it.

There are three types of sizes that will isolate and seal the acrylic gesso so that it won’t suck the oil out of the paint.  They are: skim milk, PVA, and acrylic varnish.  But only one of them will ALSO isolate and seal the wood so that it won’t absorb water, and that is the acrylic varnish.  All this time many of us have been lead to believe that we should use a coat of PVA glue to isolate the wood first, before we apply the gesso.  But research shows that it DOES NOT WORK!   The wood remains absorbent in spite of the PVA, so it sucks the water out of the gesso, and our unsealed gesso sucks the oil out of our paint (aka, the “suede effect”)!

So, the bottom line to protect the layers and keep the paint from sinking in is this:
1) Paint the wood with one coat of acrylic varnish (I bought matte–this is not the same as acrylic matte medium). After it dries,
2) apply the gesso (1-3-coats), then after the gesso dries thoroughly,
3) quickly apply a thin coat of PVA.  It dries fast, so you can’t fuss with it–just get it on as quickly as possible.

How to Make Superior Linseed/Stand/Sun Oil

Cleanse the Oil

Buy unadulterated, unrefined cold-pressed flaxseed oil in the health food store cold case.   Solgar Earth Source Organic Flaxseed Oil is a very pure brand, but always check the ingredients on whatever brand you buy to make sure nothing has been added, such as vitamin E, etc.

The Old Masters knew it was important to remove mucilage and particulates from the unrefined oil before making Stand/Sun Oil.  Here is a way to combine the process:

Step 1:  Place water and oil in the sun—do not shake together

For this step, you will need:

1. A white opaque glass container—Pyrex works well

2. A clear glass lid if you are expecting rain (Pyrex baking dishes often come with a lid)

3. Rigid screening enough to cover your dish

4. Ant powder (depending on your location–I couldn’t believe how much ants like to eat oil!)

  1.  Place oil 1” deep in white opaque glass container, with clear glass lid with spacers for air circulation.  The lid is only necessary if there is danger of moisture.
  2. SLOWLY add 2 times the amount of distilled water to the oil.  Water is polar and pulls certain substances like a magnet, creating a “water sediment trap” which will drop below the oil.  DO NOT SHAKE or agitate.
  3. Lay a piece of rigid screening over the top to keep out larger flies, bees, gnats, ants, and particles.  Ants are a big problem in my area, so I sprinkle a solid line of ant powder around the base of my dish, a couple of inches away (no need to ask how I learned this).
  4. Sit oil and water in direct summer sun and air for at least 3-6 days and nights.  DO NOT STIR the oil and water AT ALL.  Within 2 days, you will see the mucilage drop from the oil and rest on the water below.  Do not repeat any of the above steps or the mucilage will not separate.

Step 2:  Decant the clean oil with a ladle and dry filter it

Don’t become impatient with this step–it takes time for the oil to drip through filters.

For this step, you will need:

1. Psyllium

2. A broom straw or toothpick

3. 3 jars

4. A wide spoon

5. collander

6. bowl

a.  After 3-6 days outdoors, it is normal to see detritus in the oil and it will be a noticeably lighter color.

b.  Sprinkle a thin layer of dry psyllium onto the oil (Don’t use too much! I did, as you can see how much this fine powder expands).  It will float.  Use a toothpick, weed or straw from a broom and by light gentle surface agitation of the floating husk, it will sink and lock the mucilage as the psyllium expands.  This holds mucilage firm for the removal of clean oil. If you have sprinkled the psyllium somewhat evenly, surface agitation probably won’t even be necessary.

c.  Do 2 separate decantings:

      1st)  Use a wide spoon to skim off clear oil, NO WATER. Keep this oil separate from the next decanting.

      2nd)  In a separate jar, do the same thing as before, only this time you will probably get some of the water mixed in. Add psyllium again to remove the water.

d.  Both decantings need to be filtered a final time with a funnel using a coffee or cotton ball filter.  The cotton seems to work better and faster–the coffee filter is too fine.  It takes a couple of hours to completely drain and it should be clear with no water; if not, do it again. Also, drain the psyllium separately in a colander over a bowl for a couple of days—you’ll recover lots of good oil.

Here are some photos to give you an idea of what to expect:

StandOilFiltering

Still Filtering, Flaxseed Oil, Psyllium Powder, Freshly Cleaned Linseed Oil

StandOilFilteringScreenPsyllium

Screening Used in Early Filtering of Bugs, Psyllium, etc.

StandOilDrainingLeftoverPsyllium

Draining Remaining Oil from Leftover Psyllium

StandOilPsylliumTexture

Closer Look at Psyllium Texture

Stage 2, coming soon, will encompass how to make the stand oil per Louis Velasquez’ instructions.

The Arizona Renaissance Art Guild does one-week workshop intensives three times per year, and in addition, we get together to paint all day on the third Saturday of every month.  If you are in the Phoenix Metro area and are interested in finding out more or possibly joining our colony, please let me know through this blog.  ~Marsha

FROM THE WORKSHOP OF THE ARIZONA RENAISSANCE ART GUILD

The Taos Society of Artists had about six to ten members, the Hudson River School up to twenty-five.  Our Arizona Renaissance Art Guild is small, with eight to twelve members, so if we’re talking about numbers, the Guild is in good company.  Who knows what history’s retrospective look at us will be….

Anyway, I’m back from the workshop, having had the most grueling week of fun ever!  We literally painted from morning until night, sometimes as late as midnight, only to begin again the next morning around eight a.m.  If we had had some bunk beds and a shower, I think we might have just stayed at the museum. The Gilbert Museum is a wonderful place for us to work and they have been so very gracious to us over the last eight or ten years, especially the museum’s director, who always goes out of her way to make sure the facility is top notch.

Some of us copied the Old Masters, and some did original works.  And speaking of retrospectives, I will be providing individual pictorial ones on some of our artists at a later date, but I just want to give you a photographic overview of the work we did this past week, and the environment we work in.  Some of the unusual colors you may see are underpaintings designed for specific effects later on.  Also, keep in mind these photos are just snapshots.  We all know what a picture is worth, so here it goes:

P1070451

P1070379

P1070443

P1070448

P1070385

P1070438

P1070440

P1070383

P1070445

P1070442

P1070422

P1070423

P1070424

P1070431

In related news, I got a new easel. I used a French easel until I wore it out, so I bought a new, more robust travel easel.  After much research, I settled on the “Belmont” by Jack Richeson.  It can support the larger size boards I often work on, can tilt forward for pastels, and lay flat for oil glazing or watercolor. Yes, other easels can do all this as well, but this one is special in important respects: it is made of renewable lyptus wood AND it’s on wheels so I can use it for a sort of hand truck when loading my supplies after a workshop (Of course, never put heavier things on it–it’s not really a hand truck, after all :-)).  I got it from Madison Art Supply who had the best price at the time.  They provided quick delivery, too.

What sold me on this particular easel is that another of our members had one, and one day, he showed me how easy and FAST it was to set up and take down.  I was amazed and “sold” at the same time.  The fact that it was from Richeson was a plus, because their company is at the top when it comes to customer service.  They will make sure you are happy with your purchase, especially if you have a problem.  And in this case, I did have a problem: the bottom tray didn’t grip well enough and wanted to drift downward (over the course of hours of painting) and I had to readjust it periodically.  It wasn’t an urgent problem, but I called them about it anyway.  They sent me another tray and made sure it got to me by the second day of the workshop!  These people are incredible so consider Jack Richeson brand the next time you need art supplies.

The Arizona Renaissance Art Guild does one-week workshop intensives three times per year, and in addition, we get together to paint all day on the third Saturday of every month.  If you are in the Phoenix Metro area and are interested in finding out more or possibly joining our colony, please let me know through this blog.  ~Marsha

AND IN THE END…

Here are the remaining painting photos we took at the Getty and the de Young museums. The experience was unforgettable and I’m happy to have shared it all with you.  I will see you here again after my workshop (see April 17, 2013 post).

GeorgesDeLaTourTheMusicians'Brawl

The Musicians’ Brawl, about 1625, Georges de La Tour (1593-1652), French, oil on canvas

“In this painting, a brawling musician lifts his hand squeezing lemon juice into the eyes of his supposedly blind opponent. The imposter’s guide gasps with dismay while the two spectators all knowingly laugh at the spectacle of deception revealed. An early work by La Tour, this painting exhibits sharp diagonal rhythms, rapid calligraphic brushwork, and swift modulations in coloring to resonate with the violence of the subject.”

Interestingly, my husband made an important observation in this narrative painting that was not mentioned in the museum placard: the hurdy gurdy has the crank going into the right side of the instrument, yet the figure is holding the crank in his left hand. There is a reason for that–he has a knife in his right hand, prepared to stab the man that has called him out for being a fake. Can you see it?

GuidoReni

The Virgin and Child with Saint John the Baptist, 1640-42, Italian, Guido Reni (1575-1642) oil on canvas, 68 x 56

“In this depiction of a meeting between the young Christ and Saint John the Baptist, Guido Reni eliminated unnecessary detail and concentrated on the scene’s emotional qualities. The eyes of the two children meet as Mary looks on. The doves that the Christ Child gives to his cousin are an allusion to both Jesus’s future role as the King of Peace as well as his eventual sacrifice. Joseph enters through a doorway in the background.”

“Although using oil, Reni applied his color with the broad brushwork of fresco painting. He outlined important details with dark, jagged strokes. It was once thought that the sketchy appearance of Reni’s late works meant that they were unfinished, but like many aging artists, Reni pared form and color to the bare essentials for purely expressive purposes.”

CornelisBegaTheAlchemist

The Alchemist, 1663, Dutch, Cornelis Bega (1631/32-64), oil on panel, 14 x 12 1/2

CornelisBegaTheAlchemist1

Another view with a better angle, of this tiny painting packed with information and detail, The Alchemist.

“Oblivious to his cluttered surroundings, the unkempt figure of an alchemist sits among a chaotic jumble of paraphernalia. He holds a scale while weighing out a substance for one of his experiments in making gold. By the seventeenth century, alchemy was no longer considered to be a respectable science, and its practitioners were often the subject of ridicule. ”

“In this genre scene, Cornelis Bega commented on time wasted on materialistic and futile pursuits. Like other Dutch artists of his time, Bega was a close observer of natural appearances. Textures and surfaces of the assorted cracked clay and glass vessels are accurately described. Light pouring in through the open window and the harmonious tones of brown, gray, and blue give the painting a cozy warmth.”

CopleyMarySargent

Mrs. Daniel Sargent (Mary Turner Sargent), 1763, John Singleton Copley (1738-1815), oil on canvas, 49 1/2 x 39 1/4

Hovenden ThomasLast MomentsOf JohnBrown

The Last Moments of John Brown, ca. 1884, Thomas Hovenden (1840-1895), oil on canvas

You must go here and learn much about this artist, Thomas Hovenden, who seems to have “slipped through the cracks” of the American artists’ cannon: http://www.tfaoi.com/aa/8aa/8aa547.htm

Note: All text in quotes is taken from the Getty or de Young museum placards posted beside paintings.

FRANK COVINO WORKSHOP ANNOUNCEMENT!

I know how ridiculously short notice this is, as I didn’t think to use my blog venue to get the word out, but Maestro Frank Covino, my long-time teacher and mentor, is flying to Phoenix from Vermont to teach our one-week workshop. The cost is $675 for five days of the most intense, informative hard work you will ever LOVE! I wrote  about him in earlier posts (See March 5, 8, and 9).

If you are in the Phoenix Metro area and would like to join our small group (the Arizona Renaissance Art Guild) for this workshop, contact me ASAP to reserve your space. As I have said in earlier posts, you will learn more from Frank in one week than in probably all the other workshops you have ever had, put together. Also, our group of artists are extremely friendly and helpful to newcomers–no shyness here–and we do it all with good heart and encouragement. We are all in varying degrees of progress, so don’t feel intimidated and know that none of us will ever try to make you feel that way. Come to the workshop with an open mind, leave your preconceptions at the door, and you will be amazed at what you will accomplish!

Following is our materials list that presumes you are new to painting.

Materials for board preparation and graphing:

Masonite board

renaissance gesso

Golden acrylic matte medium

metal yardstick and ruler

clear 18” triangle

acetate

extra fine and fine Sharpies

General’s charcoal pencils

photo of Old Master painting to work from, 8”x10” one color, one grayscale, glossy photo paper

Materials for sketching and charcoal:

grayscale 8”x10” photo

General’s charcoal pencils

vine charcoal

blending stumps (tortillions)

Exacto knife

India ink and liner sable brush

Drawing and Painting Materials:

pens/pencils

ultra-fine permanent markers, black, blue, green, red

acetate pad

charcoal pencils

vine charcoal

blending stumps

metal yardstick

metal 18” ruler

transparent triangle, 18”

kneaded eraser

India ink

spray workable fixative

Exacto knife

clear tape

artist’s white tape

Golden acrylic matte medium

Masonite or hardwood board

sandpaper very rough #40-60, very smooth #100-200

natural sponge

Knox Gelatin

paint roller for application of gesso

retouch varnish

Liquin

turpentine for brush cleaning

olive oil for brushes, cleaning hands, oiling palette

leak proof turpentine container

easel

plastic wrap

blue paper towels

mahl stick

notebook

palette knives

**Renaissance Gesso

**Covino Controlled Palette

**Covino Medium

Brushes:

bright sable #2, 4, 10

flat bristle #2, 4, 10

round sable #1, 8

round bristle #0, 8

mongoose flat #6

mongoose round #0

mongoose filbert #4, 8

Paint:

*titanium white

*flake white

ivory black

mars black

chromium oxide green

pthalo blue

cadmium yellow light

yellow ochre

raw sienna

raw umber

cadmium orange

burnt sienna

burnt umber

cadmium red light

alizarin crimson permanent

cobalt violet

ultramarine violet

French ultramarine blue

cobalt blue

cerulean blue

viridian green

Shiva cadmium green

Grumbacher pthalo yellow green

Winsor and Newton Winsor orange

Indian yellow

napthol red light

That’s all–enough, right? We hold the workshop in a museum so, once we get set up, we don’t have to pick up our stuff all week–we just lock it up and leave it all there until the next morning.  Also, everyone has their own large 6′ table and the space of a dance hall, so you can dance, or go back 30 feet and walk up on your painting to check your progress.

Needless to say, I will not be posting next week, but I’ll be back ASAP after the workshop.

AN AMAZING ALTARPIECE, MOSAIC, AND WOODEN SCULPTURE

Even though they didn’t fit into my “paintings” category, I just had to show you three unique pieces I saw at the Getty and de Young museums.  The altarpiece room was exceptionally dark, so the following photos are the best I could get. Click on the text photos to make them readable.

The first is the Ecco Homo Altarpiece by Maerten van Heemskerck (1498-1574), Netherlands. About the artist:

HeemskerckNetherlands

About the Ecco Homo Altarpiece:

EccoHomo

EccoHomoAltarpieceHeemskerck

EccoHomo1

EccoHomoRevealed

The central panel:

EccoHomo2

About fading and discoloration:

EccoHomoFadedPaints

The reds:

RedsDiscoloration

The blues:

BluesDiscolorations

The greens:

GreensDiscoloration

When the altarpiece is closed, the following two figures are what you see:

EccoHomoStMargaretVerso

StMargaretOfAntiochHeemskerck

EccoHomoStJohnVerso

StJohnTheEvangelistHeemskerck

Here, you can see another exceptionally worthy altarpiece, the Ghent Altarpiece by Hubert and Jan van Eyck with extreme closeup, X-radiography, infrared macrophotography, infrared reflectography and so much more, at http://closertovaneyck.kikirpa.be/#home/sub=altarpiece

Next, look at the amazing artistry and detail of this mosaic:

PortraitOfCamilloRospigliosi

Portrait of Camillo Rospigliosi, about 1630-40, glass mosaic, by Giovanni Battista Calandra, Italian, 1586-1644

“This mosaic depicts Rospigliosi, brother of Pope Clement IX and Knight Commander of the Order of Santo Stefano, whose cross insignia he wears. Because mosaics are composed of many pieces of small stones, ceramic, or glass tiles, they preserve their color more permanently than paintings–thus making them an appropriate medium for the commemorative art of portraiture. Like the painters of this period, Calandra rendered his subjects with great realism.”

Here are some closeups:

CloseupOfCamilloRospigliosi

CloseupOfCamilloRospigliosi-1

CloseupOfCamilloRospigliosi-2

And finally, this sculpture is made of wood, believe it or not. It is called Saint Gines de La Jara, about 1692, by sculptor Luisa Roldán (aka La Roldana), Spanish, 1650-1706. The one who painted the sculpture (aka polychromer) is Tomas de Los Arcos, Spanish, born 1661.

P1070014

It was so tall that this upward shot was the best I could get. See the hands?

P1070011

And the feet?

P1070013

“Saint Ginés de La Jara exemplifies La Roldana’s artistic talents. The body is relatively straight and self-possessed, while the arms stretch outward. La Roldana masterfully worked the hands and feet, sculpting the veins and bones so that they dramatically push against the taut skin. The painting by her brother-in-law, Tomás de Los Arcos, enhances the carving. The statue displays the realistic expression found in Spanish religious imagery made for churches and convents in the second half of the 1600s.”

Note: All text in quotes is taken from the Getty or de Young museum placards posted beside paintings.

MANIFEST DESTINY AND THE HUDSON RIVER PAINTERS

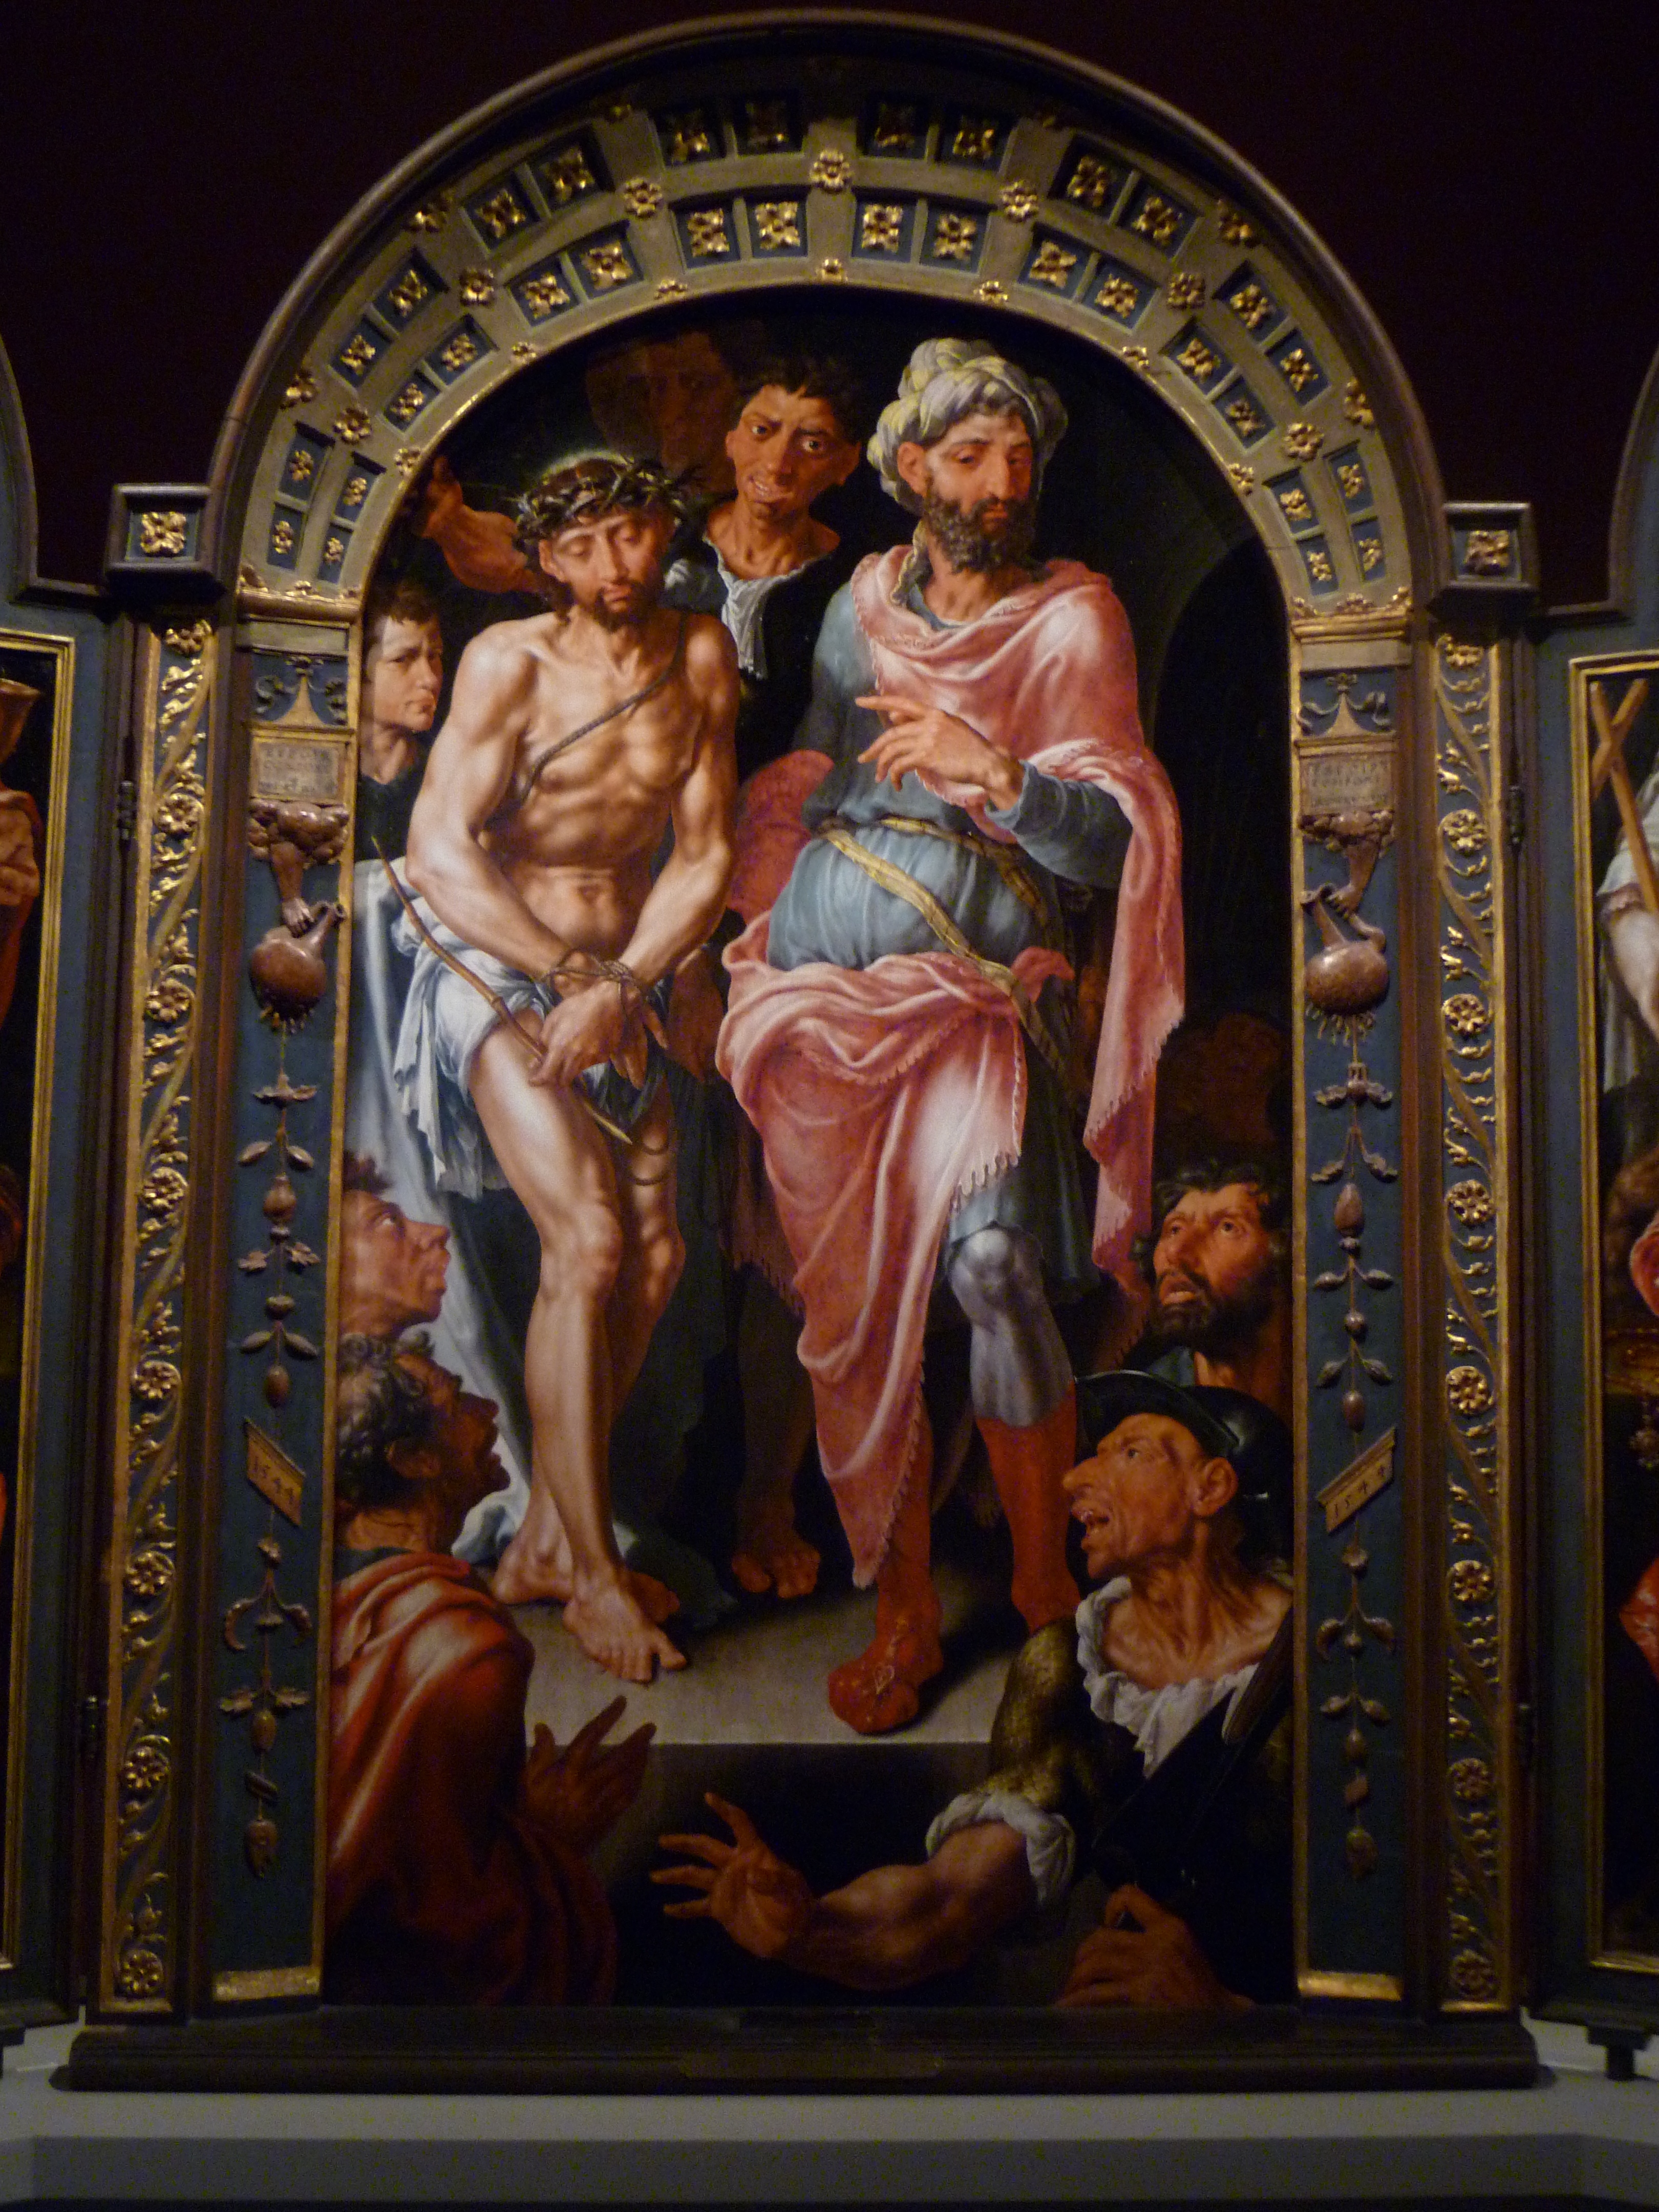
On our visit to the museums, we saw an exquisite plethora of paintings by the Hudson River School painters. This artist “fraternity” was started by Thomas Cole and continued to grow over the course of about eighty years.

In some ways, the Hudson River School became a response to “Manifest Destiny,” a belief filled with the hubris that white men literally had a God-given right and responsibility to control the land. At first, it inspired these artists and they tried to portray that concept.  But as time passed, they became more and more aware of the true price of Manifest Destiny—how industrialization was polluting, ruining the land, and affecting Native Americans—and began to portray this in their paintings, sensitively leading the way as our nation’s first “environmentalists.” Watch for this as you look at the paintings below, ordered chronologically:

ThomasColeViewNearTheVillageOfCatskilloil on wood, 1827, 24 ½ x 35

View Near the Village of Catskill, 1827, Thomas Cole (1801-48), oil on wood, , 24 ½ x 35

CropseyJasperViewOfGreenwoodLakeNewJersey

View of Greenwood Lake, New Jersey, 1845, Jasper Francis Cropsey (1823-1900), oil on canvas, 30 3/4 x 40 3/4

BinghamBoatmenOnTheMissouri

Boatmen on the Missouri, 1846, George Caleb Bingham (1811-1879), oil on canvas

“In the mid-19th century, the major western rivers of the United States served as interstate highways, with steamboats carrying both passengers and cargo. These steamboats were refueled on the river by “woodhawks,” men in small flatboats loaded with chopped firewood. Missourian George Caleb Bingham presented these boatmen as links between nature, represented by the wooded riverbank in the background, and civilization, symbolized by the advancing steamboat.”

“Bingham’s images of boatmen, now associated with the American Midwest, originally were considered railroad subjects because of their association with the frontier of pioneer settlement. Like the New England Yankee or the Western cowboy, Bingham’s Missouri boatmen were celebrated for their independence and helped to create both a regional and a national sense of identity. Bingham’s idealized depictions of boatmen as free laborers reflected his opposition to slavery and its extension into the western states.”

BinghamGeorgeCalebCountryPolitician

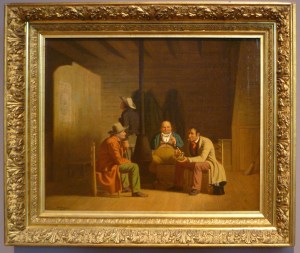
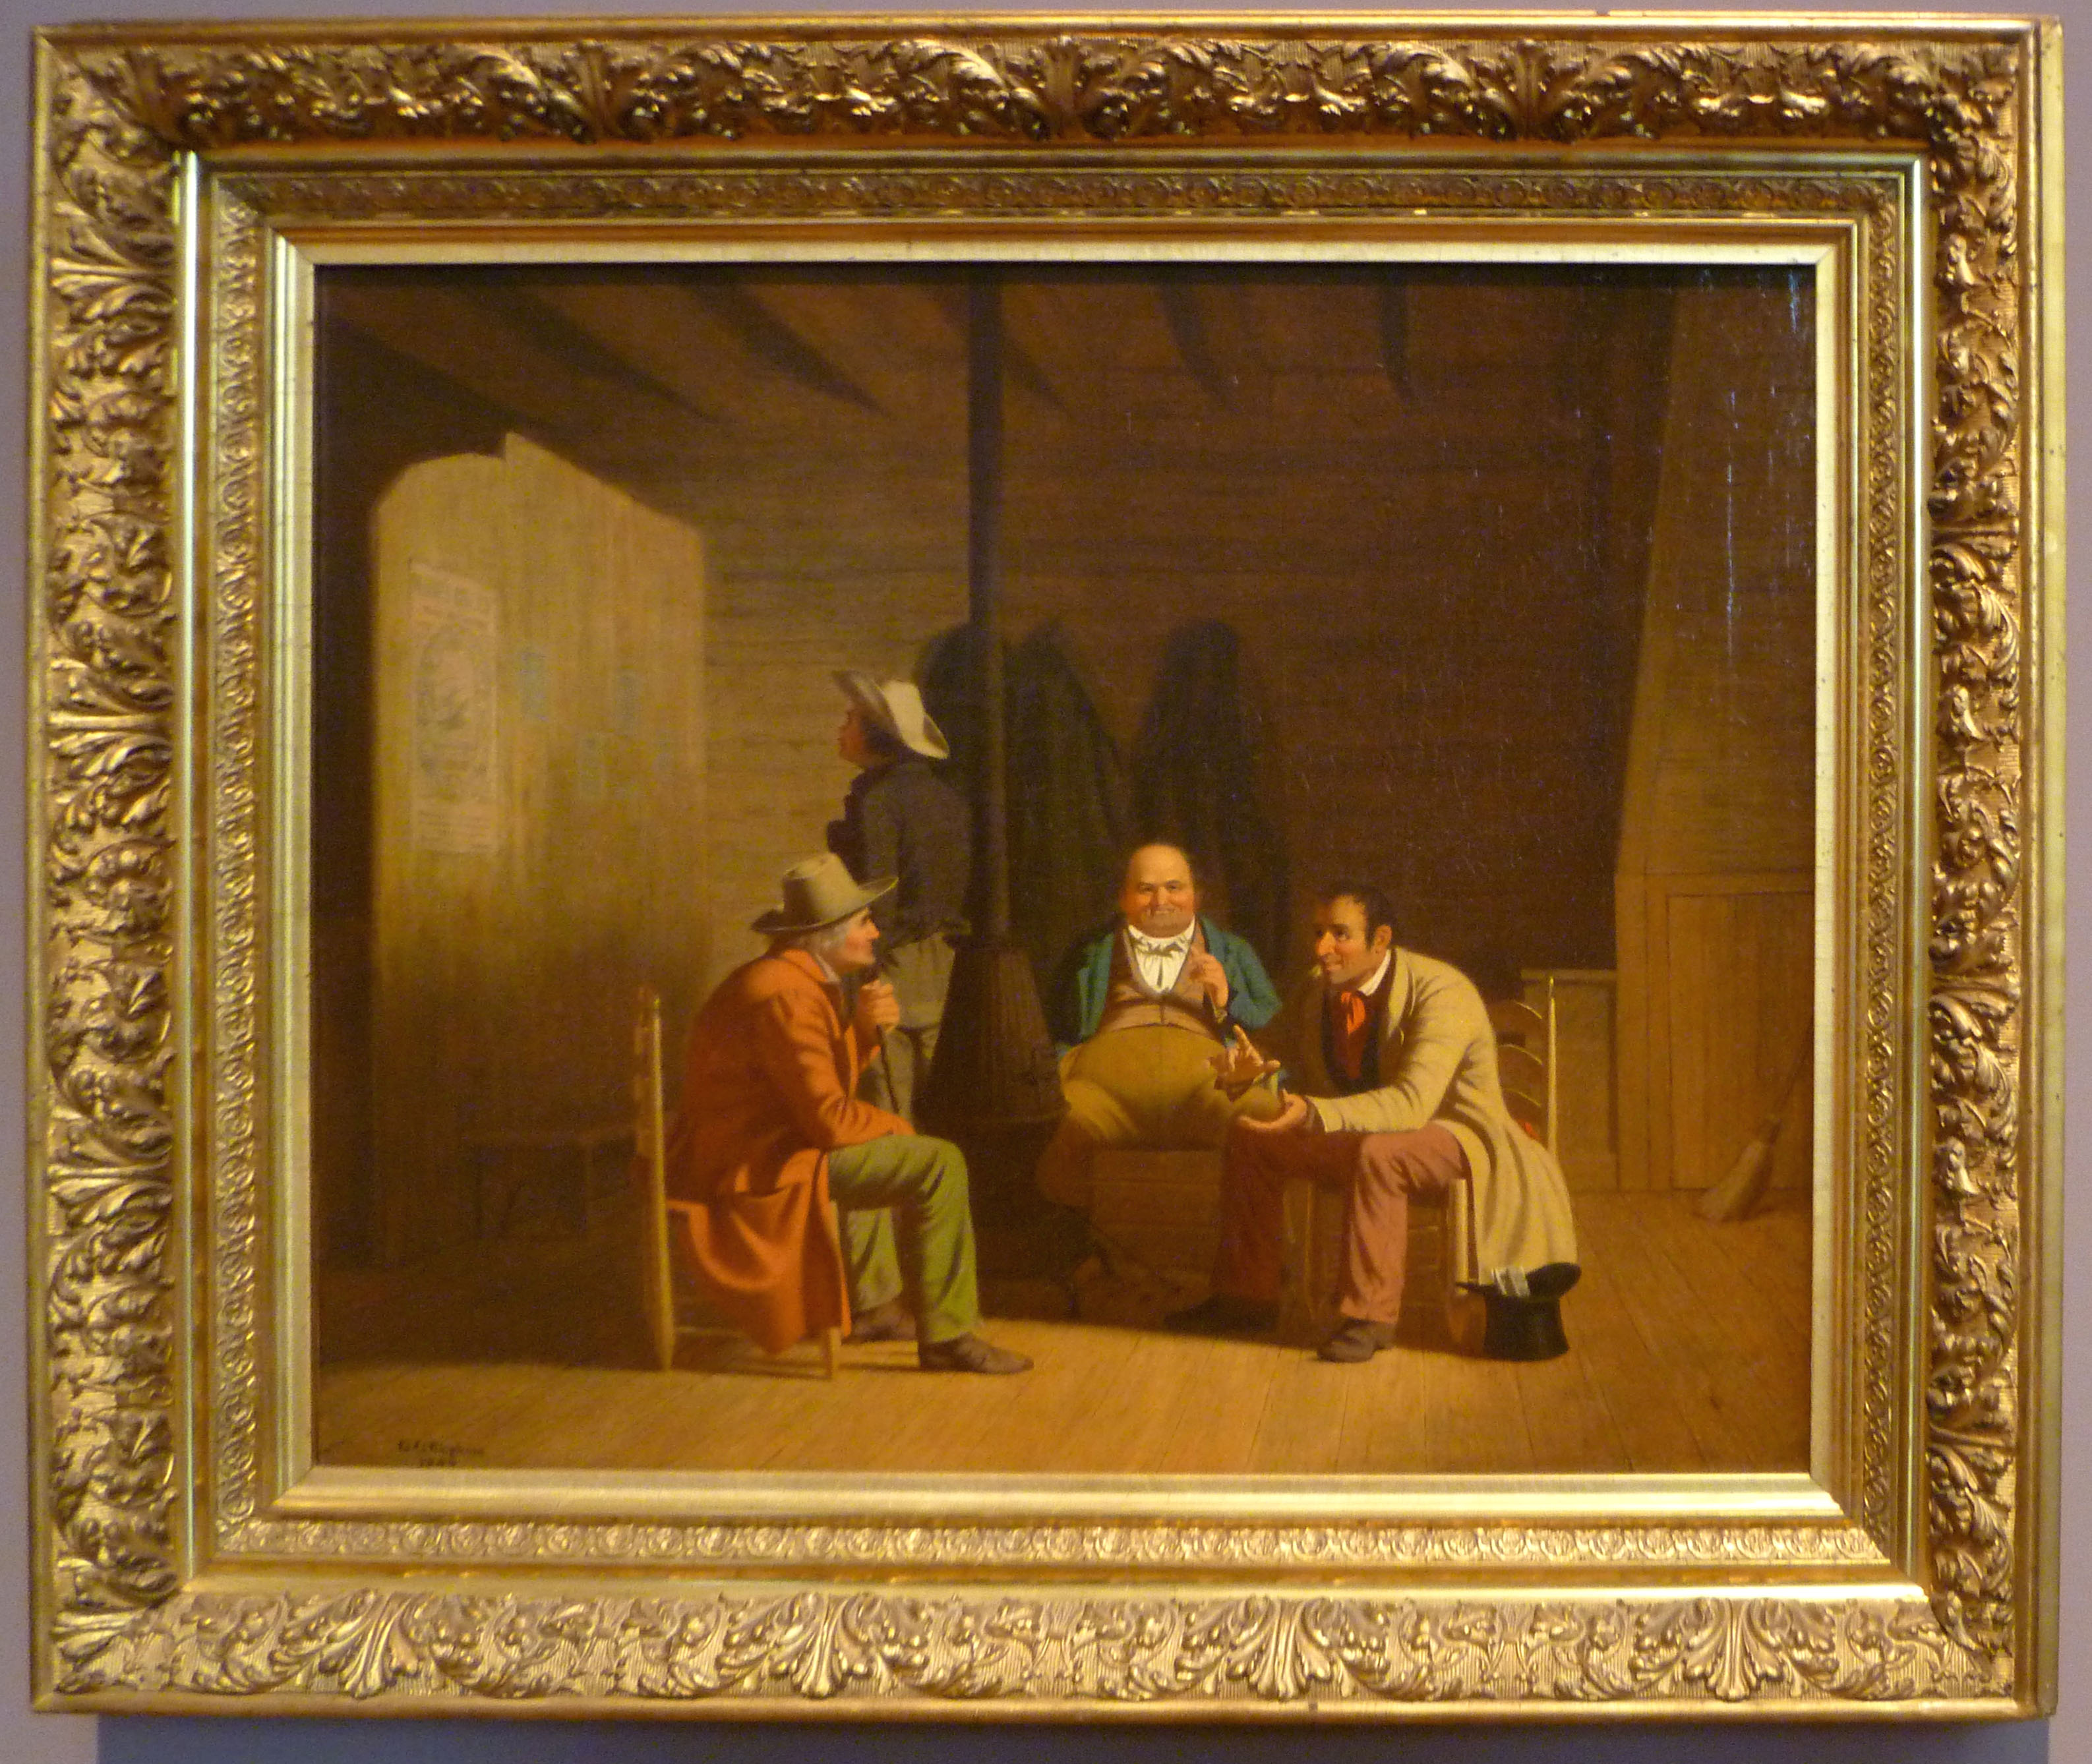
Country Politician, 1849, George Caleb Bingham, oil on canvas

Country Politician, painted soon after George Caleb Bingham was elected a U.S. Congressman for Missouri, depicts American democracy in action. Seated near a stove, a young politician attempts to enlist the support of an older rural farmer, while a businessman–perhaps a local power broker–listens attentively. Bingham’s political subject would have resonated with his fellow Missourians, who participated in the intense debates about slavery that dominated American politics prior to the Civil War.”

“In 1849, the Missouri Senate passed the pro-slavery ‘Jackson Resolutions,’ which asserted that it was unconstitutional for Congress to limit slavery in its new territories. Bingham countered by introducing the ‘Bingham Resolutions,’ which recommended that the issue of slavery in the territories be decided at the state level. Country Politician promotes Bingham’s grassroots view that such difficult questions should be left to the ‘wisdom, intelligence and patriotism of the people of the entire Union.'”

Bierstadt

The Arch of Octavius (Roman Fish Market), 1858, Albert Bierstadt (1830-1902), oil on canvas

“Ancient Rome’s Portico of Octavia, built by Emperor Augustus in 23 B.C.E., gradually fell into ruin and became a fish market in the 12th century. By the time Albert Bierstadt traveled to Italy in 1857, Rome was defined largely by its historical roles in the Roman Empire and the Italian Renaissance. It was also the most important destination for wealthy tourists who made the Grand Tour of Europe to view the roots of western civilization.”

“Americans such as the stoic man clutching his red Rome guidebook, accompanied by his wary wife, considered themselves the heirs of ancient Greek and Roman ideals, emulating their democracies and architecture. Yet Bierstadt’s painting documents the decline and fall of ancient Rome’s monuments, while two famous antique statues, the Sleeping Endymion and the Barberini Faun, are reincarnated in a sleeping man and the adjacent street sweeper. The fish-scale and scallop-shell frame motifs offer a playful pun on Bierstadt’s subject.”

At the same time Bierstadt was painting The Arch of Octavius, Asher Durand worked on his “River Landscape”:

AsherDurandARiverLandscape

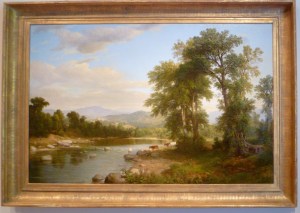
A River Landscape, 1858, Asher Durand, oil on canvas, 32 x 48

BierstadtSunlightAndShadow

Sunlight and Shadow, 1862, Albert Bierstadt, oil on canvas

“Albert Bierstadt’s view of the Gothic Revival chapel of the Löwenburg Royal Castle near Kassel, Germany, was based on an oil sketch he made in 1855 while a student at the Düsseldorf Academy. Given the religious subject, Bierstadt’s poetic title evokes associations with spiritual enlightenment and darkness. However, he also contrasts the man with a top hat inside the sunlit church with the impoverished woman nursing her infant, who serves as a traditional Christian symbol of charity but is cast in shadow on the steps outside.”

“The oak tree, a symbol of enduring faith in the face of adversity, and also of the cross, crucifixion, and resurrection of the Christian religion, was adopted as the national tree of Germany. Bierstadt incorporated oak branches and leaves into his custom-designed, Gothic Revival frame. This historical style, inspired by medieval precedents, sought to endow many machine-made, mass-produced goods of the industrial era with an aura of spiritual value.”

BierstadtViewOfDonnerLakeCalif

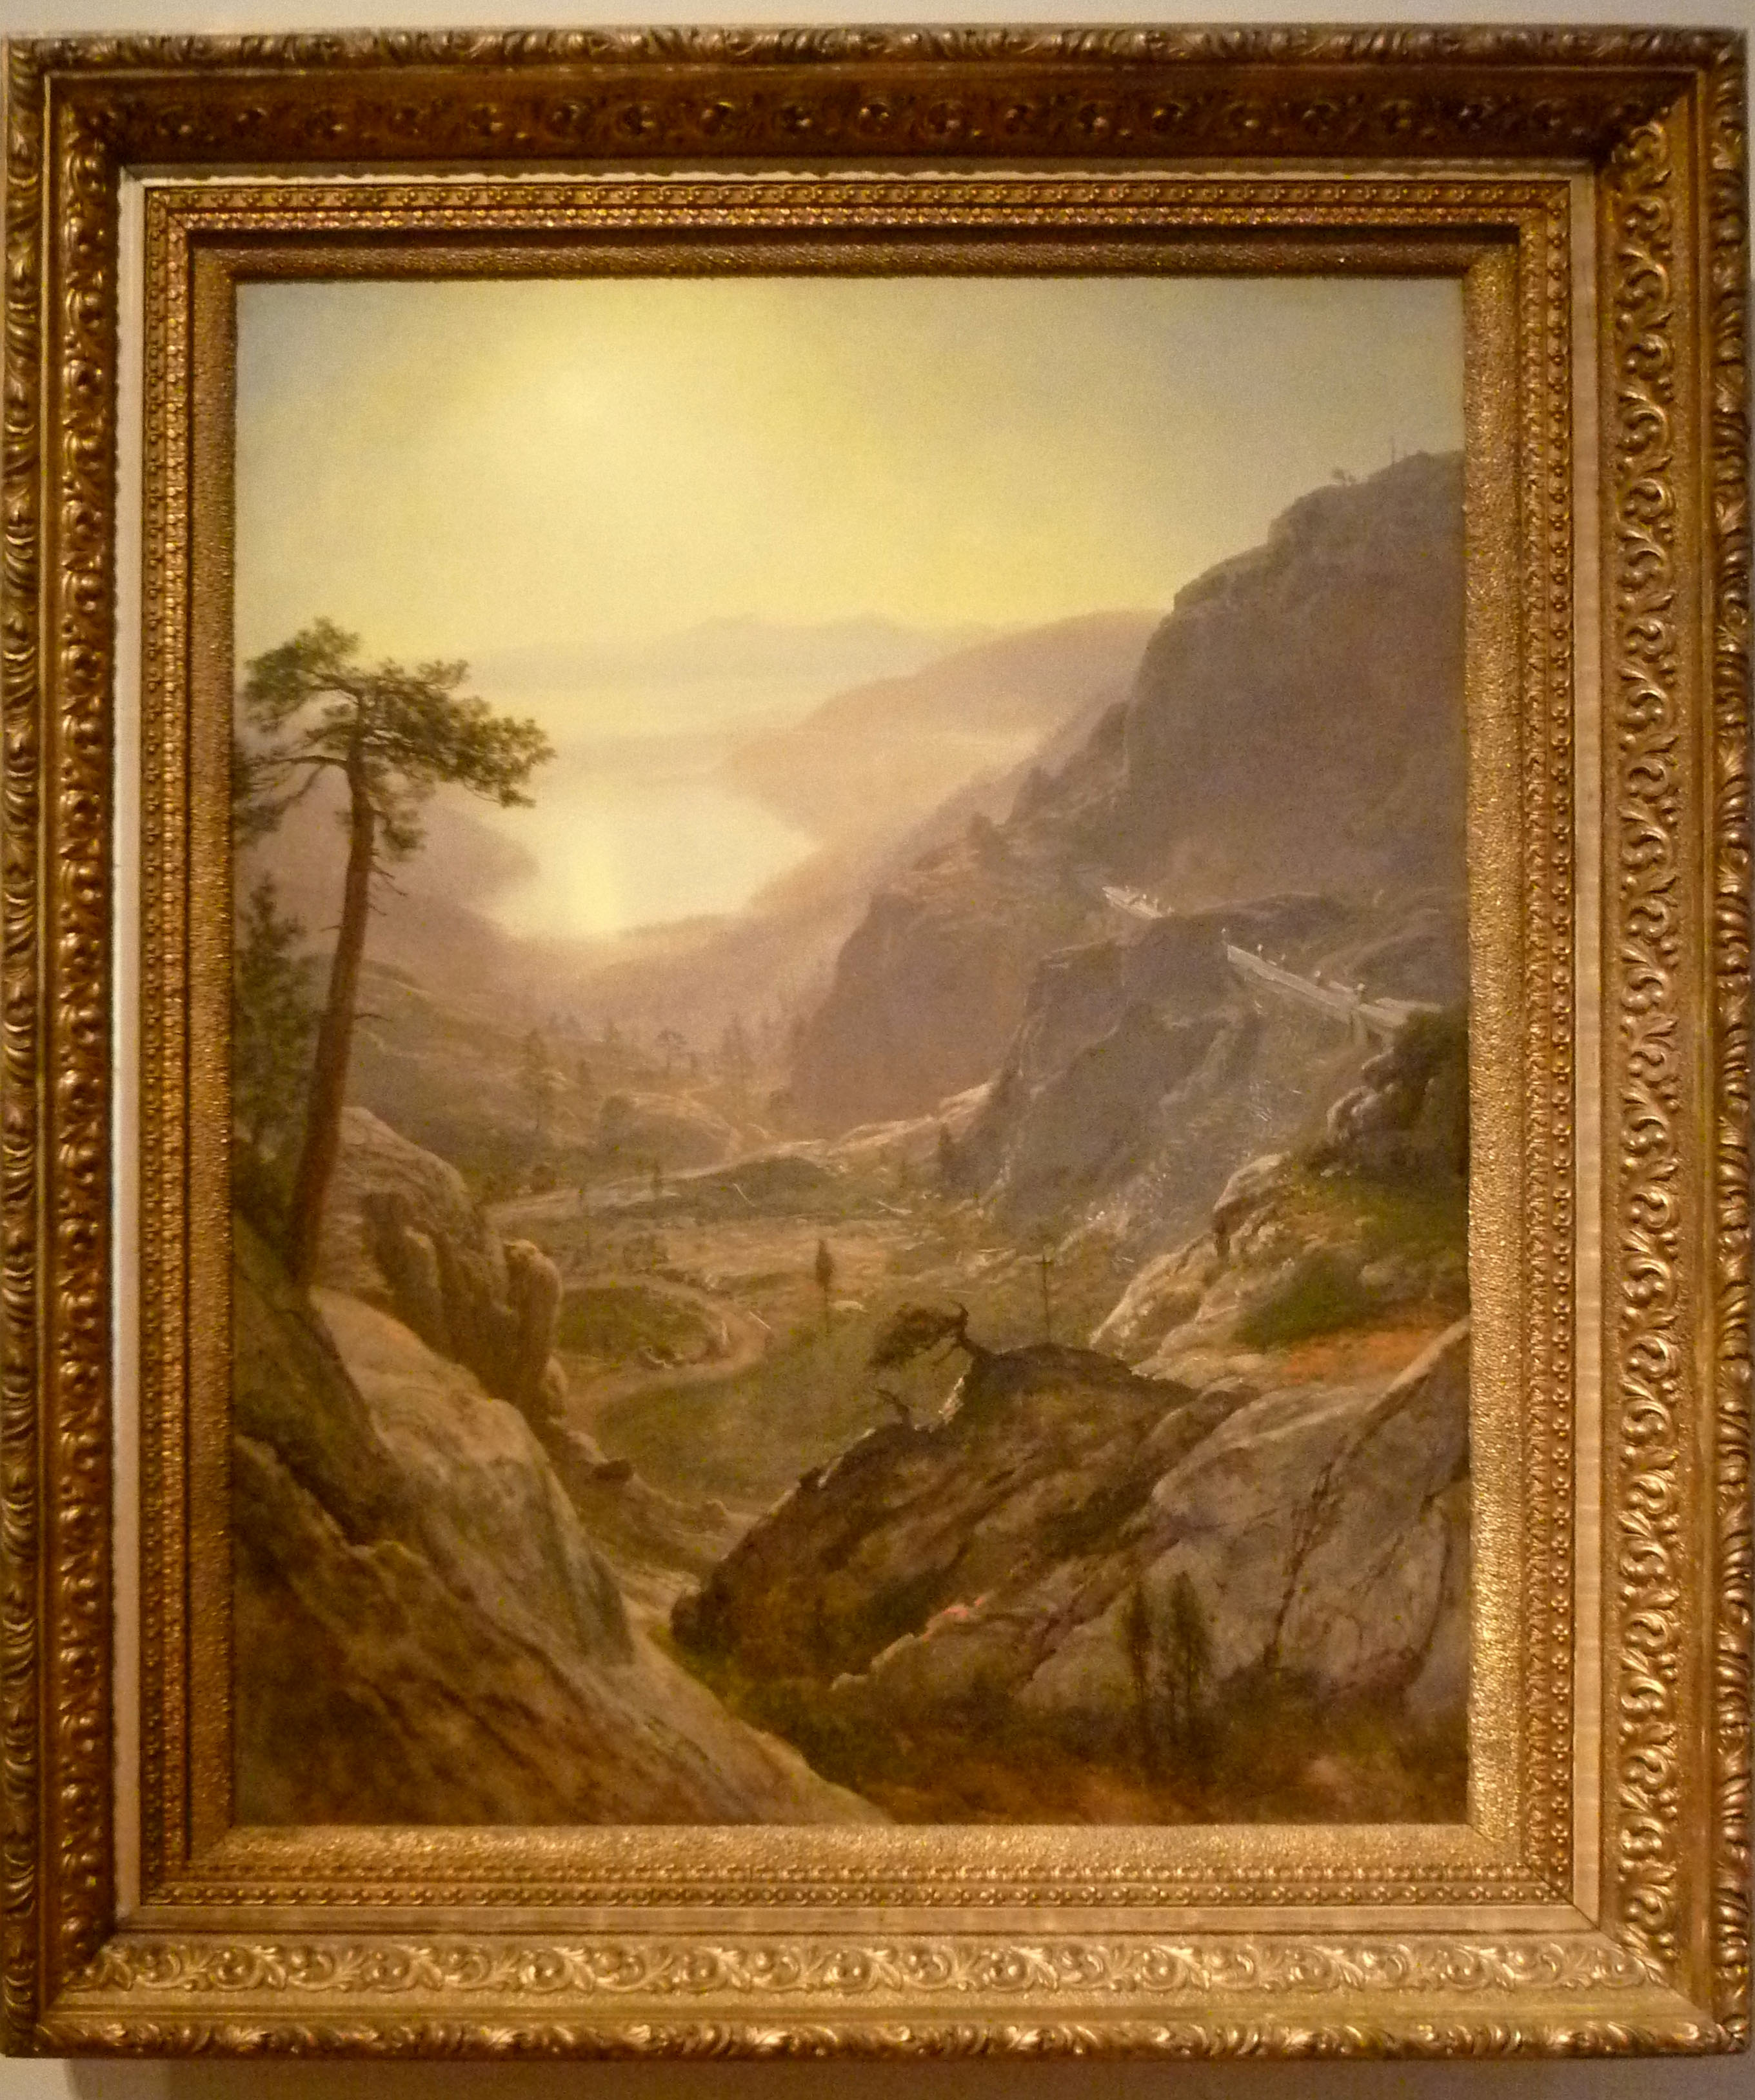
View of Donner Lake, California, 1871-72, Albert Bierstadt, oil on paper mounted on canvas

“Bierstadt made this study for a larger work that depicts a pass through the Sierra Mountains, several hundred feet above the Central Pacific Railroad.”

BierstadtNassauHarbor

Nassau Harbor, ca. 1877, Albert Bierstadt, oil on paper mounted on paperboard

From the Getty Museum Placard: “THE HUDSON RIVER SCHOOL was not a school, but a group of artists who shared the goal of establishing an American landscape painting tradition independent from that of Europe. Despite nationalist motivations, Hudson River School artists were strongly influenced by European aesthetic concepts of the sublime (nature’s awesome power), the beautiful (harmonious and pleasing nature), the picturesque (nature softened by the hand of man), and association (the association of natural sites and human structures with historical events).”

“A sketching tour by Thomas Cole up the Hudson River to the Catskill Mountains in 1825 is usually considered to mark the beginning of the Hudson River School. New York City was the geographical center of the movement, which was also called the ‘native,’ ‘American,’ or ‘New York’ school. Although the artists traveled and worked in Europe, their favored subjects included the Hudson River region, as well as the Catskill, Adirondack, and White Mountains, and coastal New England.”

“Thomas Cole depicted the American landscape as a New World Eden that represented both god’s creation and the nation’s destiny to settle the “wilderness.” Frederic E. Church sought to evoke cosmic truths by blending art and science in large-scale landscapes. Martin Johnson Heade and Sanford Robinson Gifford created light-suffused landscapes that evoked a spiritual presence. Albert Bierstadt’s panoramic landscapes celebrated the grandeur of the American West and its suitability for settlement.”

“The decline of the Hudson River School style was brought about by the Civil War, which permanently altered Americans’ perceptions of their country and its contested landscape, by the growing popularity of European art among American critics and collectors, and by the fulfillment of America’s self-perceived Manifest Destiny to settle the entire continent, an accomplishment that reduced the American landscape’s rhetorical resonance.”

MartinJohnsonHeadeOrchidAndHummingbird

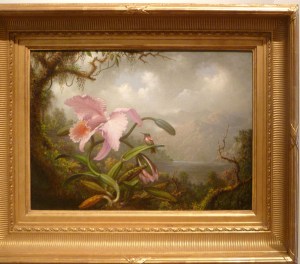
Orchid and Hummingbird, 1885, Martin Johnson Heade, oil on canvas

MoranThomas

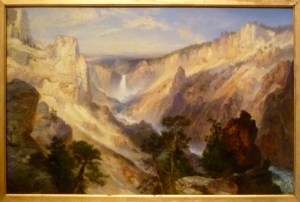
Grand Canyon of the Yellowstone, Wyoming, 1906, Thomas Moran (1837-1926), oil on canvas

ThomasMoran

Grand Canyon with Rainbow, 1912, Thomas Moran, oil on canvas

Note: All text in quotes is taken from the Getty or de Young museum placards posted beside paintings.