ARCHIVAL, SOLVENT-FREE PAINT LIFE, STAGE 2

Greetings.  I have returned to my blog after much jumping through hoops to upgrade our Internet service, a task that is not always so easy when you live outside a metro, have no access to wireless, and need to climb a mountain and run wire (in conduit so the animals don’t eat it) to receive a signal.  But here I am at last, and my husband and I are very happy to have a new and faster service!

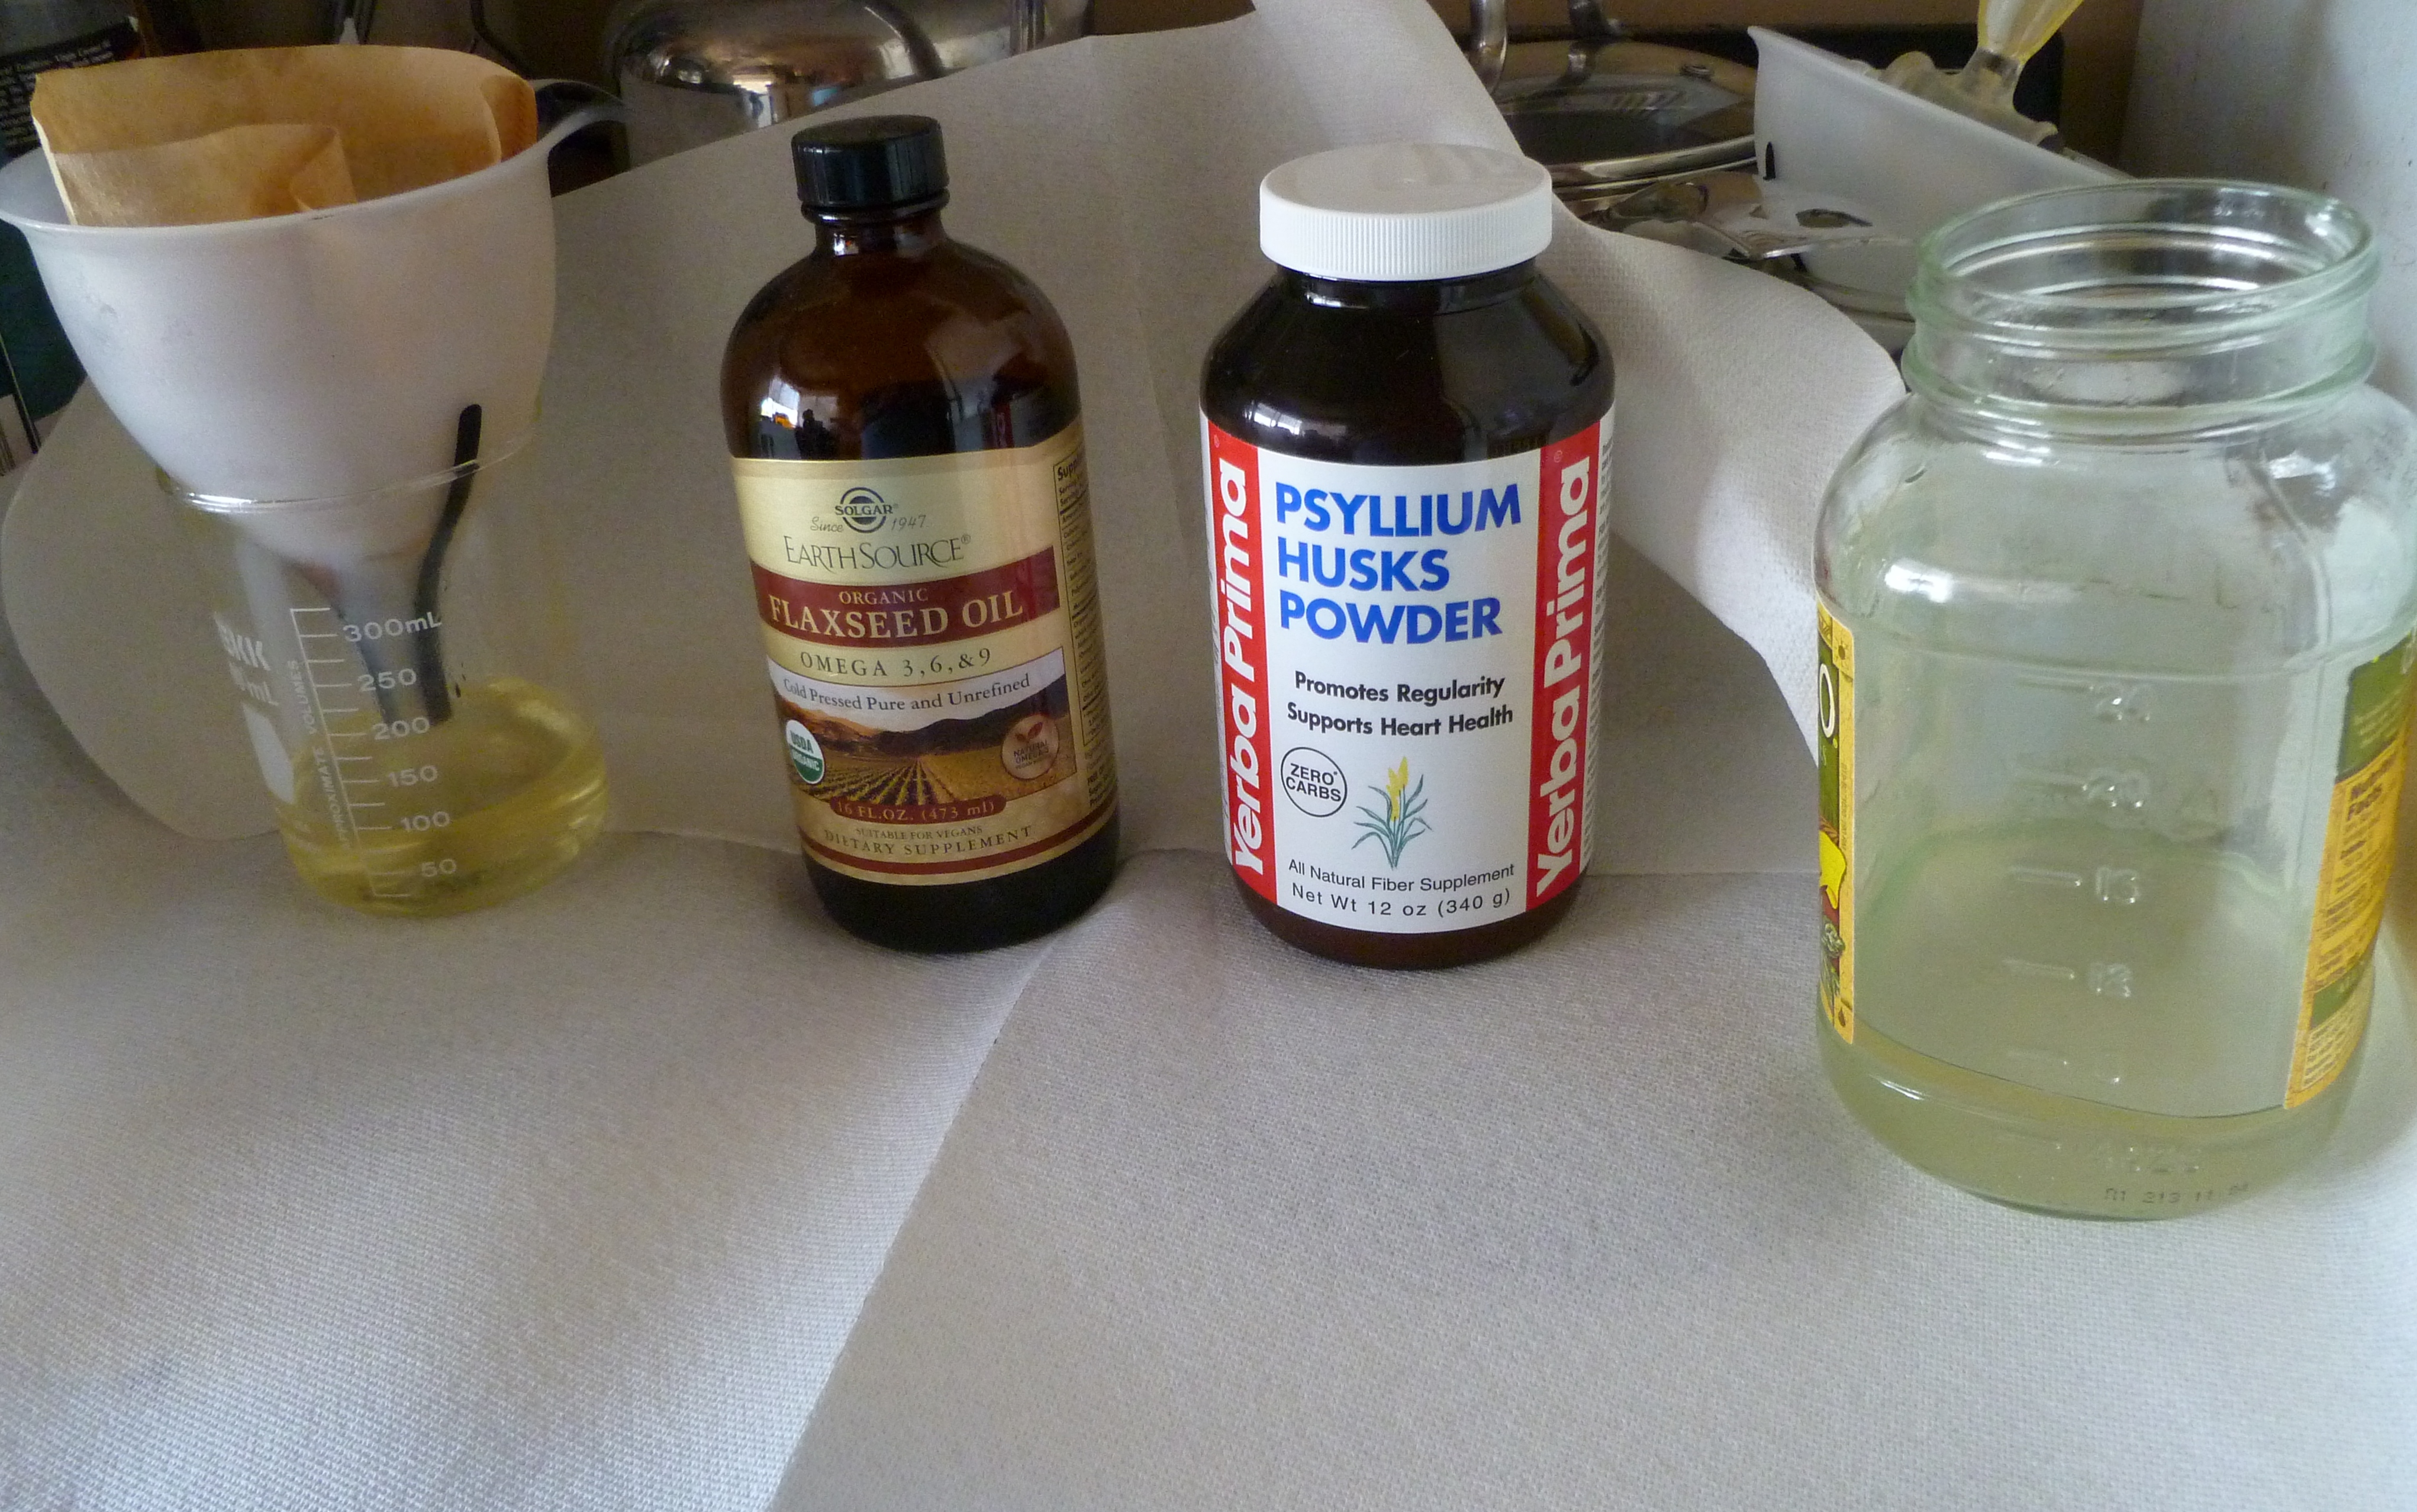
See my first post on this topic, “Archival, Solvent-free…,” dated 5/14/13, where I had experimented with making my own stand oil (Stage 1) by cleaning the mucilage out of it first, from the directions given in Louis Velasquez’s book. My only regret so far is that I did not start with TWO bottles of flaxseed oil instead of just one.  It is now a beautiful linseed oil and I would like to save some of it in it’s present state but, if I do that, I won’t have enough to make very much stand oil (Rewind would be so wonderful).

English: Flax The seeds of flax are used to ma...

English: Flax The seeds of flax are used to make linseed oil. (Photo credit: Wikipedia)

In this post, I put it in the Arizona sun (Stage 2), using Velasquez’s method, to make stand oil that is a faster-drying oil than can be purchased at art supply stores. The commercial stand oil in art stores has been overheated and, as a result, becomes slow-drying.

I expect that, at 108 degrees with less than 10% relative humidity, my oil will not even take two weeks–but we’ll see.  I must do it now to beat the monsoons that usually arrive in early July, because water would be an enemy of this oil.  Here is the process:

Sun-Thicken the Oil to make Stand Oil (aka Sun Oil)

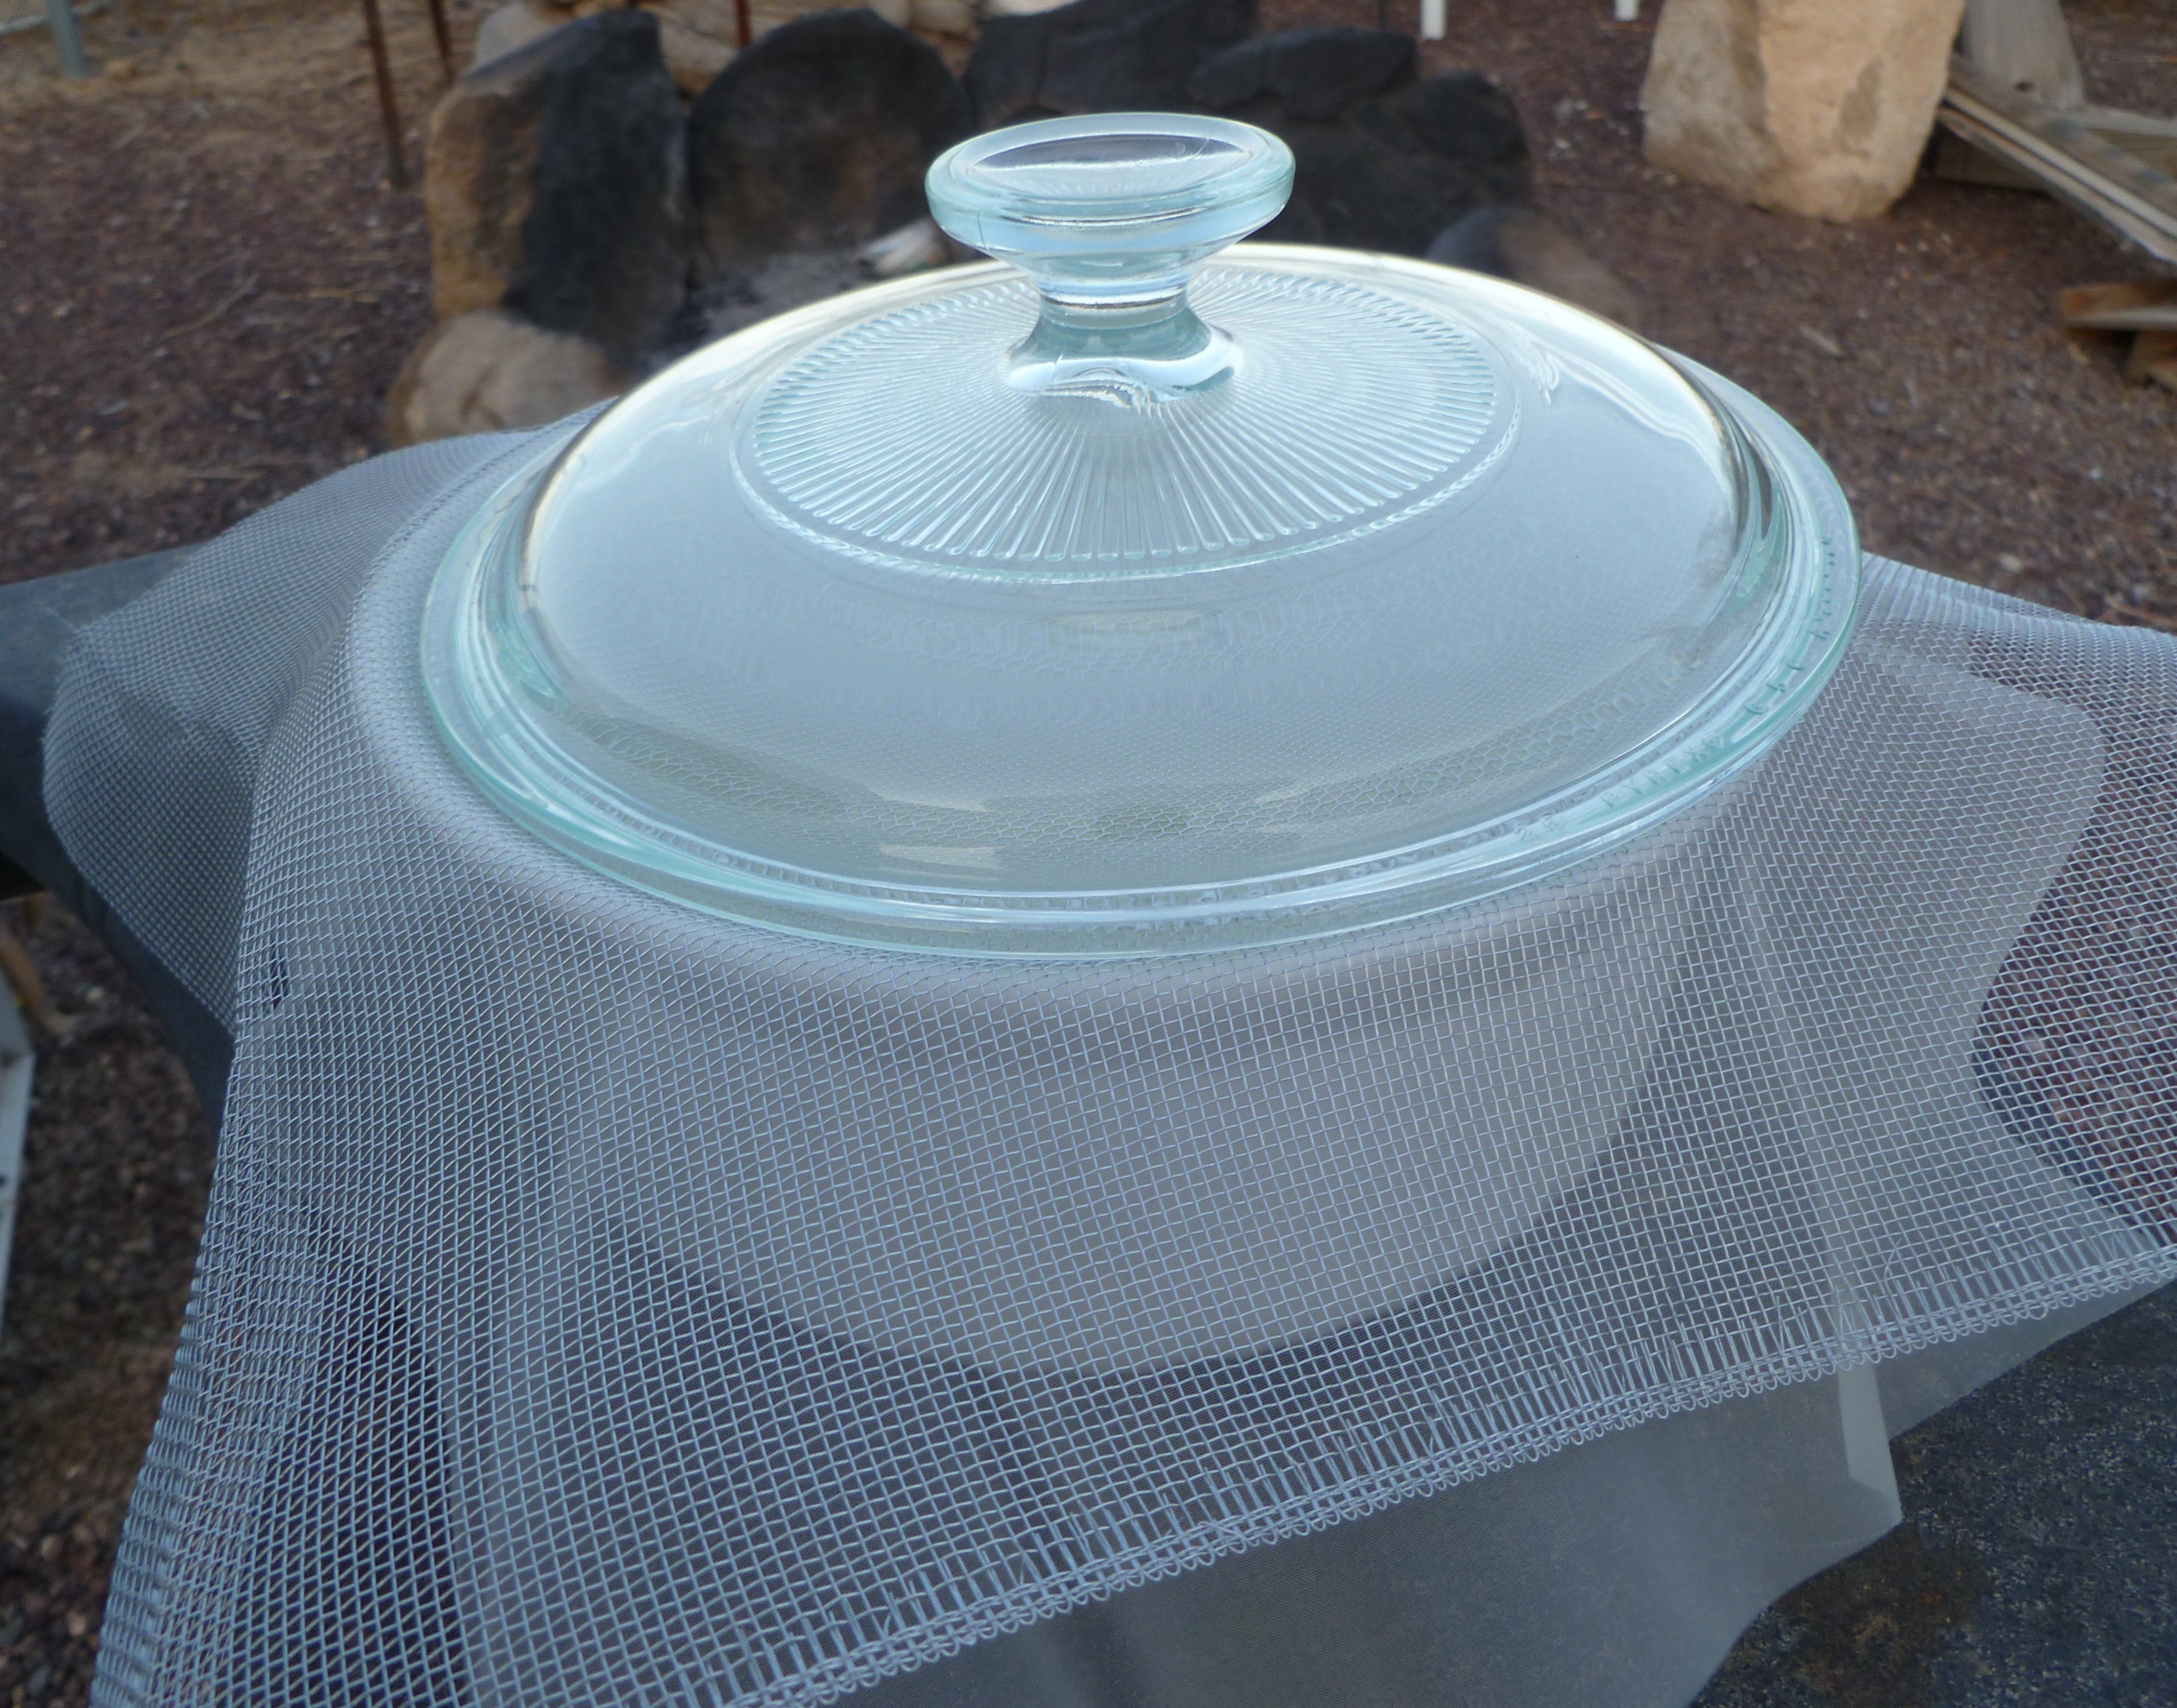
1.  Pour cleansed linseed oil into a white, opaque container to ¾-1” depth (not shallower, or the resulting stand oil will wrinkle the paint badly), NO WATER contamination. Set the dish inside a perimeter of ant powder, if necessary.  I found out the hard way during Stage 1, that some kinds of ants LOVE this oil with a fervor you wouldn’t believe until you’ve see it!

P1070781

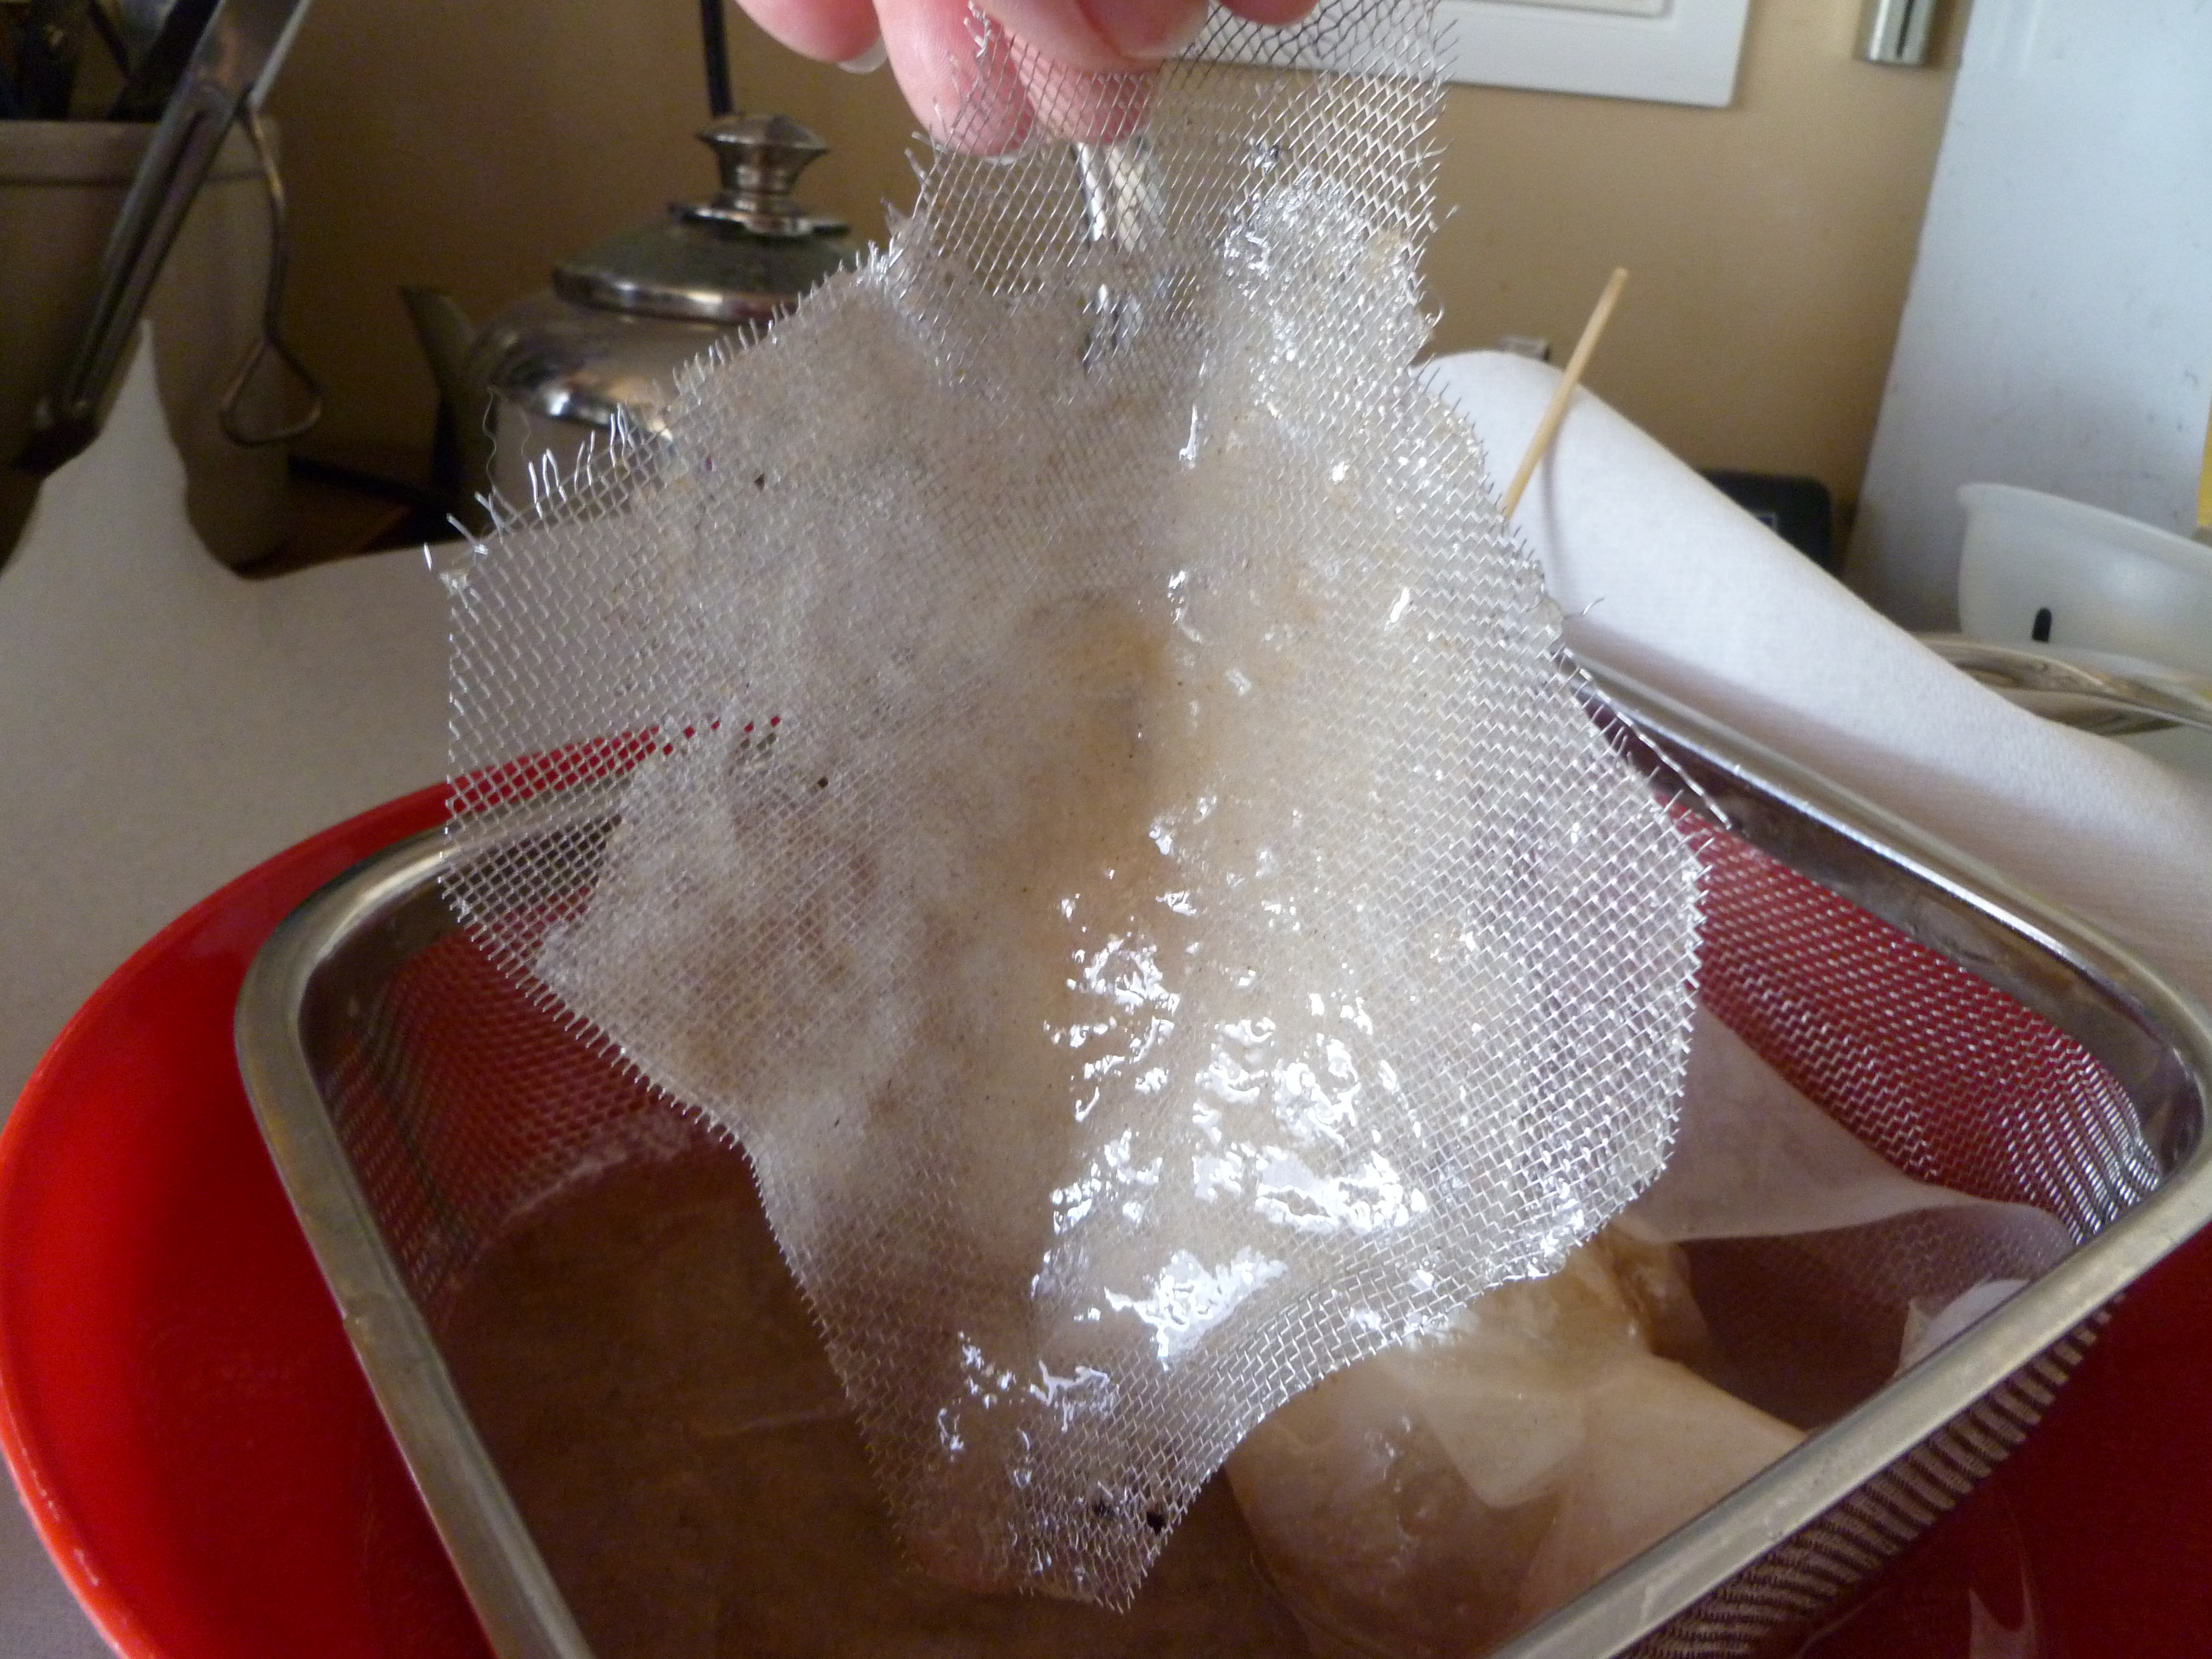
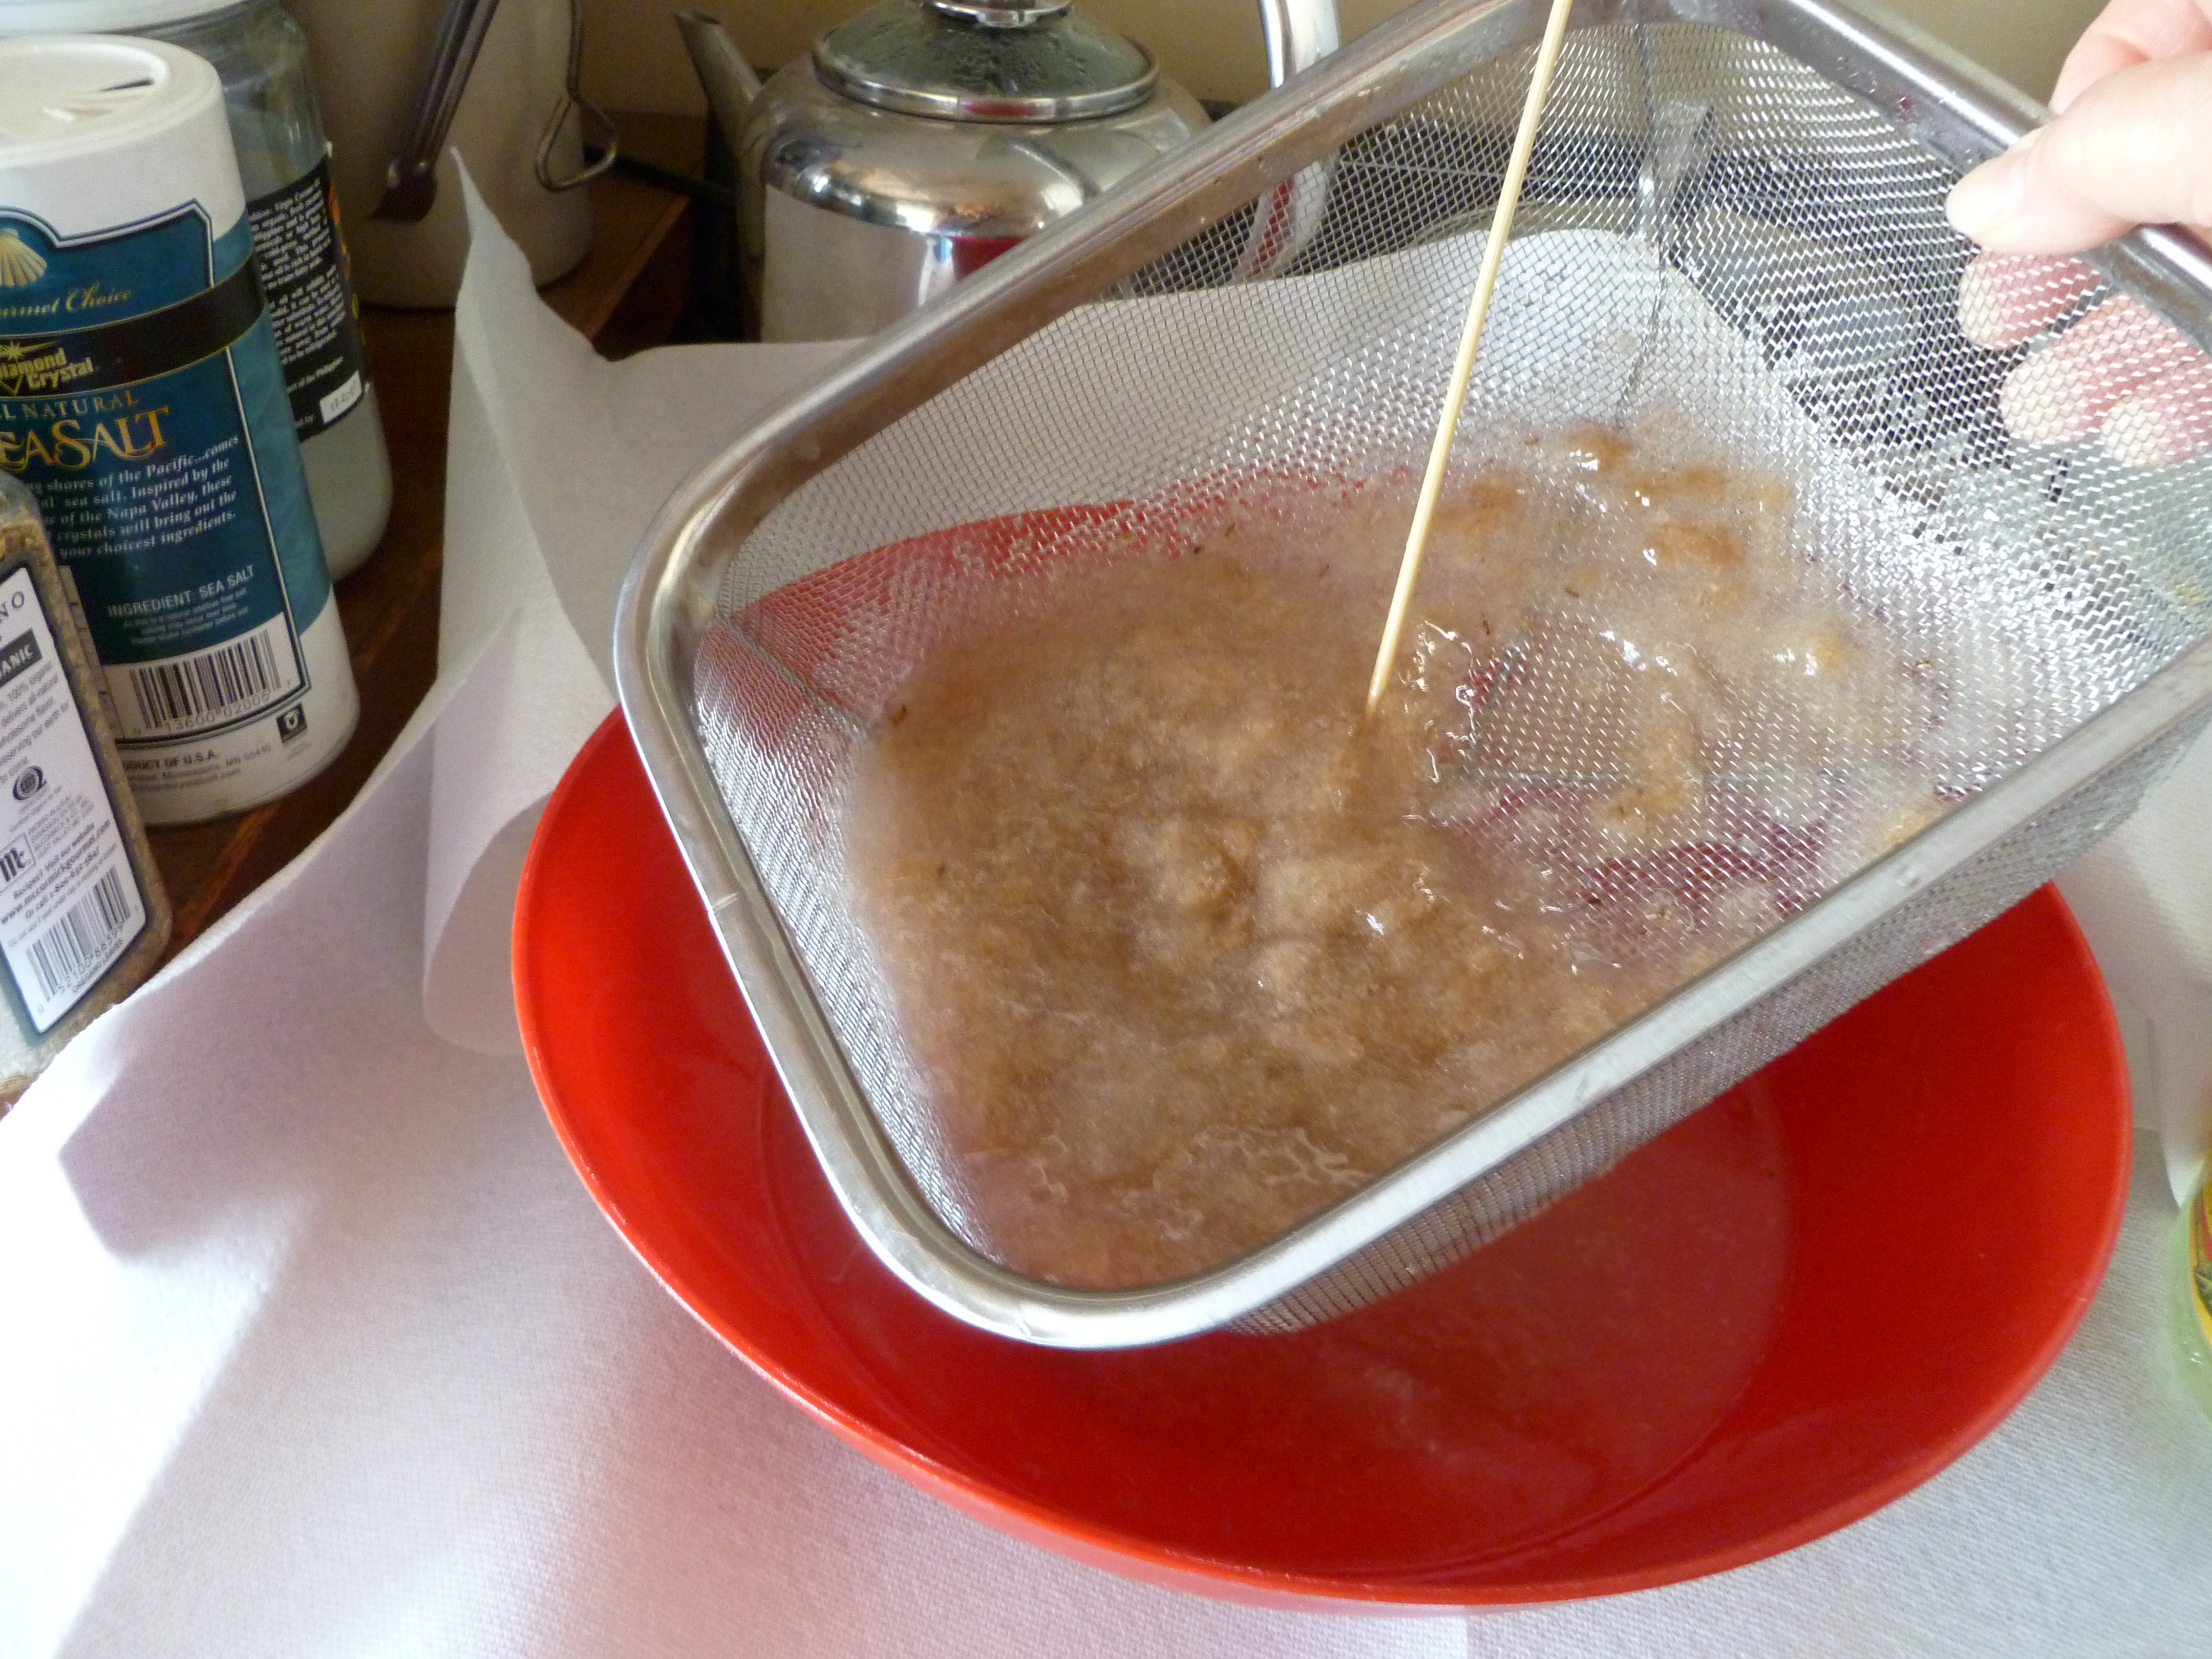
2.  Cover to keep out most detritus but leave gap/clearance allowing air circulation—I layered a piece of breathable organza to keep out even the teeny bugs, some screen and then put the lid on partially.  The screen seems to hold the lid up enough, especially with the lid canted.

P1070782P1070783P1070785

3.  Expose oil to direct summer sun as much as possible, stirring briskly for about 30 seconds, twice daily, more frequently in very hot, dry areas.  Stirring aids in the even and complete oxidation of the oil.  I am guessing I’ll have to stir mine twice as often with something small that doesn’t waste too much oil left on the stirrer.

4.  After 15-30 days, depending on location and season, it will thicken, the hotter and dryer the weather, the faster.  Let it thicken to the viscosity you prefer.  The only rule is don’t let it get so thick that it forms a skin or globs that resist stirring.

5.  With a funnel and a cotton ball, filter the oil of dust/insects. It should be clear, palest yellow.  Place a loose cap on the jar as it expands and contracts when in storage as it continues to dry.

6.  IMMEDIATELY CLEAN THE WHITE DISH, using non-solvent thin linseed oil or olive oil to remove the sticky sun oil, wipe, then wash with soapy water. If you fail to do this, it will not come off and you’ll be discarding your otherwise perfectly good and useable dish.

After my Stand Oil is done (hopefully in two weeks), we will continue on to Stage 3 of the process of making what promises to be a most wonderful medium.

The Arizona Renaissance Art Guild does one-week workshop intensives three times per year, and in addition, we get together to paint all day on the third Saturday of every month.  If you are in the Phoenix Metro area and are interested in finding out more or possibly joining our colony, please let me know through this blog.  ~Marsha

EXPERIMENTING WITH MAKING MY PAINTING LIFE FULLY ARCHIVAL, YET SOLVENT-FREE

HOW TO MAKE YOUR PAINTING LIFE SOLVENT-FREE, YET EXCEPTIONALLY ARCHIVAL, JUST LIKE REMBRANDT, VELASQUEZ, RUBENS, AND OTHER OLD MASTERS DID

Last week, I experimented with making my own stand oil (Stage 1) by cleaning the mucilage out of it first, from the directions given in Louis Velasquez’s book. My goal is to put it in the sun (Stage 2) per his instructions to make a faster-drying oil than can be purchased at art supply stores. The kind you buy is overheated and, as a result, becomes slow-drying.

Here is a drastic consolidation of a most information-packed and well-researched book by Louis Velasquez, an esteemed artist and materials researcher.  He is a treasure—unselfish, helpful, and dedicated to authenticity and truth with little regard for how much money he pockets.  The book is dense with information, so I have made its most salient points more accessible in this greatly abbreviated synopsis.  He provides copius amounts of free information on his website, and you can order the very reasonably priced book from Louis Velasquez’s website at http://www.calcitesunoil.com to begin your solvent-free, OM archival-quality painting life.

VelasquezBookCover

Isolating the Support, Primers

The Old Masters isolated the absorbent wood with a glue size before they applied the gesso, because wood is porous and absorbs water like a sponge.  And you can’t apply gesso directly on unsized wood because it is made with PVA which just soaks into the wood.  Experiments show that acrylic gesso is very absorbent and needs to be sealed before we paint on it.

There are three types of sizes that will isolate and seal the acrylic gesso so that it won’t suck the oil out of the paint.  They are: skim milk, PVA, and acrylic varnish.  But only one of them will ALSO isolate and seal the wood so that it won’t absorb water, and that is the acrylic varnish.  All this time many of us have been lead to believe that we should use a coat of PVA glue to isolate the wood first, before we apply the gesso.  But research shows that it DOES NOT WORK!   The wood remains absorbent in spite of the PVA, so it sucks the water out of the gesso, and our unsealed gesso sucks the oil out of our paint (aka, the “suede effect”)!

So, the bottom line to protect the layers and keep the paint from sinking in is this:
1) Paint the wood with one coat of acrylic varnish (I bought matte–this is not the same as acrylic matte medium). After it dries,
2) apply the gesso (1-3-coats), then after the gesso dries thoroughly,
3) quickly apply a thin coat of PVA.  It dries fast, so you can’t fuss with it–just get it on as quickly as possible.

How to Make Superior Linseed/Stand/Sun Oil

Cleanse the Oil

Buy unadulterated, unrefined cold-pressed flaxseed oil in the health food store cold case.   Solgar Earth Source Organic Flaxseed Oil is a very pure brand, but always check the ingredients on whatever brand you buy to make sure nothing has been added, such as vitamin E, etc.

The Old Masters knew it was important to remove mucilage and particulates from the unrefined oil before making Stand/Sun Oil.  Here is a way to combine the process:

Step 1:  Place water and oil in the sun—do not shake together

For this step, you will need:

1. A white opaque glass container—Pyrex works well

2. A clear glass lid if you are expecting rain (Pyrex baking dishes often come with a lid)

3. Rigid screening enough to cover your dish

4. Ant powder (depending on your location–I couldn’t believe how much ants like to eat oil!)

  1.  Place oil 1” deep in white opaque glass container, with clear glass lid with spacers for air circulation.  The lid is only necessary if there is danger of moisture.
  2. SLOWLY add 2 times the amount of distilled water to the oil.  Water is polar and pulls certain substances like a magnet, creating a “water sediment trap” which will drop below the oil.  DO NOT SHAKE or agitate.
  3. Lay a piece of rigid screening over the top to keep out larger flies, bees, gnats, ants, and particles.  Ants are a big problem in my area, so I sprinkle a solid line of ant powder around the base of my dish, a couple of inches away (no need to ask how I learned this).
  4. Sit oil and water in direct summer sun and air for at least 3-6 days and nights.  DO NOT STIR the oil and water AT ALL.  Within 2 days, you will see the mucilage drop from the oil and rest on the water below.  Do not repeat any of the above steps or the mucilage will not separate.

Step 2:  Decant the clean oil with a ladle and dry filter it

Don’t become impatient with this step–it takes time for the oil to drip through filters.

For this step, you will need:

1. Psyllium

2. A broom straw or toothpick

3. 3 jars

4. A wide spoon

5. collander

6. bowl

a.  After 3-6 days outdoors, it is normal to see detritus in the oil and it will be a noticeably lighter color.

b.  Sprinkle a thin layer of dry psyllium onto the oil (Don’t use too much! I did, as you can see how much this fine powder expands).  It will float.  Use a toothpick, weed or straw from a broom and by light gentle surface agitation of the floating husk, it will sink and lock the mucilage as the psyllium expands.  This holds mucilage firm for the removal of clean oil. If you have sprinkled the psyllium somewhat evenly, surface agitation probably won’t even be necessary.

c.  Do 2 separate decantings:

      1st)  Use a wide spoon to skim off clear oil, NO WATER. Keep this oil separate from the next decanting.

      2nd)  In a separate jar, do the same thing as before, only this time you will probably get some of the water mixed in. Add psyllium again to remove the water.

d.  Both decantings need to be filtered a final time with a funnel using a coffee or cotton ball filter.  The cotton seems to work better and faster–the coffee filter is too fine.  It takes a couple of hours to completely drain and it should be clear with no water; if not, do it again. Also, drain the psyllium separately in a colander over a bowl for a couple of days—you’ll recover lots of good oil.

Here are some photos to give you an idea of what to expect:

StandOilFiltering

Still Filtering, Flaxseed Oil, Psyllium Powder, Freshly Cleaned Linseed Oil

StandOilFilteringScreenPsyllium

Screening Used in Early Filtering of Bugs, Psyllium, etc.

StandOilDrainingLeftoverPsyllium

Draining Remaining Oil from Leftover Psyllium

StandOilPsylliumTexture

Closer Look at Psyllium Texture

Stage 2, coming soon, will encompass how to make the stand oil per Louis Velasquez’ instructions.

The Arizona Renaissance Art Guild does one-week workshop intensives three times per year, and in addition, we get together to paint all day on the third Saturday of every month.  If you are in the Phoenix Metro area and are interested in finding out more or possibly joining our colony, please let me know through this blog.  ~Marsha