ART OF THE MASTERS Workshop

Hello, Artists,

gilbertsunnewsarticle6-2016

We are planning a workshop the week of November 14, 2016, which is our only opportunity window for quite a few months. Can you make it? We will also have a Free Prep Day on November 7, a week before the workshop, in order to help you get a wonderful start. The cost for the 5 days is $489.

Art of the Masters Workshop
When: Nov. 14-18, 2016
Where:  Gilbert, Arizona
Time: daily, 9:00 – 5:00

If you feel undecided, maybe now is the time to get off that fence and embrace your true art self. We promise that you will get more step-by-step art instruction in one week with us, than you will get anywhere else, even in workshops that cost more than twice what we charge. We also give you helpful handouts (most art classes don’t) because we want you to be able to remember and continue working on what we’ve taught you. To us, the most important thing is continuing the legacy of the Old Masters, and we are passionate about passing on their wisdom and techniques to others. We would love to have you with us!

And like Maestro Frank Covino always did, we offer $100 off the cost of your tuition for each of your friends that sign up for the class.

Below is a sample of first-time student drawing (24″ x 30″), in preparation for painting.  Amazing, huh!

P1110792

Here are things needed for the Free Prep Day:

Materials for board preparation, graphing, and drawing:
Ampersand Gessobord brand surface
metal yardstick and ruler
ultra-fine Sharpies, various colors (black, blue, and red are probably enough)
General’s charcoal pencils, soft
kneaded eraser
High quality photo of Old Master painting to work from, printed on 8 1/2”x11” glossy photo paper, one grayscale, one color–Art Renewal Center is an excellent online museum source– https://artrenewal.org/pages/search.php
blending stumps (tortillions)
Exacto knife
spray workable fixative
clear tape
acetate

Other helpful items:
transparent 18” triangle
India ink and sable liner brush
artist’s white tape, removable

Please respond below, and we’ll get right back to you!

Marsha and Karen
Art of the Masters

FRANK COVINO, LONG-TIME FRIEND AND MENTOR, HAS PASSED

Covino Portrait1P1070431PaintingWorkshopCovinoFrank4-2015

Dear Artists and Friends,

It is with ineffable sadness in our hearts, that I must report this news.  Our friend and long-time art teacher and mentor, Maestro Frank Covino, passed away suddenly on Tuesday, February 16, 2016, after being pronounced “cleared of cancer” just last week.

If I may use a bold simile, his loss feels like looking up at the mountains in Sugarbush, where Frank worked hard to build the home he loved, and seeing that the grandest of summits has disappeared from our sight.

Here is a note from his wife, Barbara Covino, that you will all want to read:

Subject: It is with a deep abiding sorrow in my heart that I write this letter…forgive the delay but it has taken time to believe this is true…

Beloved friends and family , one and all,

After two days of profoundest shock, and countless tears I realize I must write you.  It is with a heavy, heavy heart that i must inform you that dear Frank has passed away unexpectedly on Tuesday night, February 16th.  It was quick and he did not suffer–a death we would all prefer–but he had been progressing so well, it was a gut-wrenching shock that still is unbelievable.

I truly cannot imagine a world, or a life without him…32 years of happiness and adventure.  Life was never boring with him!!! What an amazing talent, a brilliant man with a wealth of knowledge, a gentle and sensitive man who had to excel in everything he did, and was thus an inspiration to all who knew him.  He encouraged others to strive for excellence and to believe in themselves, giving them the tools to create a positive reality in their lives, whether it be art or health.  We all can repeat that golden maxim: IT’S NEVER TOO LATE TO AMELIORATE! Wise encouraging words, those.

But he was more than the sum of his parts; he was a genuine force of nature, a real Renaissance man, but above all else, he had a kind heart and a very great soul. We all loved him so; there will never be another Frank.  But I know it is now time for each and every one of us who was touched by his life, to take that spark and pass it on.  He gave us wings and it is time for us to fly…Make him proud!!!

I am too choked up to continue writing.  God Bless each and every one of you who had a place in his heart…family, friends, students….He loved you all sincerely and without guile….

We are in the process of collaborating with the family and planning both a smaller family funeral as well as a larger set of celebrations of his life and legacy open to all who loved him–one in Vermont and one on Long island.  As soon as the Covino south clan and Mark and Jennifer and I hammer out the details, I will email you all, soon as can be done.

We are going to give that wonderful man a send off he won’t soon forget!!!

Love and blessings , Barbara Covino

PS: PLEASE FORWARD THIS to everyone you can think of. It has grown into a cast of hundreds, and forgive the delay but it has taken time to believe this is true.

PART 5, CLASSICAL ACADEMIC APPROACH, MARBLE GESSO

Did you complete your cartoon transfer yet? (See Part 4)  Keep in mind that working from a photo is not a lifetime sentence–it is a great beginning and learning tool, becoming simply reference material later on as you gain skill and begin to build a morgue of artist references.

At this stage, you should have transferred what is in each acetate grid section, box by box, triangle by triangle, to each identical grid section of your painting panel.  If you begin to think about your drawing as specific objects, turn the panel and acetate upside down and continue.  This way, it helps you to stay in the abstract and be more objective.

PaintingProcessStep2

Are the acetate and panel drawings exactly the same?  When the acetate tracing and the panel look exactly identical, you can either erase most of your grid lines, or just leave them in case you need refer to them later at some point during the charcoal drawing and underpainting.  I usually just leave them.  If your drawing has been accurately reproduced, spray it with fixative so it won’t disappear on you.  Remember that the Old Masters taught and used this same grid method to execute extremely accurate drawings, so you are in the best of company.

Now, it’s time to move on to the marble dust gesso and gelatin padding, and inking of the drawing.  Your surface should look sculpted when complete, but only to the degree of the Golden Mean.  In other words, you should aim for about thirty-three percent or less, or sixty-six percent or more of your surface area “sculpted,” but never 50-50.  Of course, this will generally be applied in areas throughout, so you will have to guess the aggregate amount.  Also, make sure you emphasize the illuminated, higher-value areas only, areas you want to advance.  The lighter the area, the more gesso or gelatin you can add.  Darker-valued areas should remain smooth and recessional.

If you plan to add any gesso or gelatin for textures, do it now during the drawing/charcoal/inking stage. Remember that the process of sculpturing your work with the marbled gesso is completely optional.  I don’t do it for every painting, but whenever I do, I never regret having the additional dimension that oil paint alone can simply not provide.

Here is an example of Rubens’ Roman charity painting, “Cimon and Pero,” where I extensively padded on the marble dust gesso to varying degrees on the man’s muscles in the light.  You can see why it is so important to study your anatomy and know the shapes of the musculature.  On the daughter, I added extra gesso to the face, breast, forward arm and hand, and on the dress folds, only on areas of light and those nearest the viewer.  Gelatin was added to stone areas only.  It is finely granulated, totally permanent and used just as it is, right out of the box.  It can be used in gesso or mixed directly in the paint, and creates a more crude surface–perfect for things like rocks, stone and bark:

Colony Website Pics1 020

If you zoom it on your computer, you can actually see where I have added marble gesso (those areas appear whiter) on this painting in progress of Titian‘s “Venus at her Toilet.”   I have built up gesso on the pearls, hair, face, the sternocleidomastoid, the breasts, abdomen, hip, arms, hands, jewelry, the angel and wings, and spent a great deal of time on the tiny trimwork of her wrap.  It’s an amazing tactile experience to literally feel the shapes as you run your hand over the painting and yes, it takes time, but it is so much worth the effort:

TitianVenus

Remember that not just any old plastic-y gesso works for this–you MUST have quite a bit of marble dust in it AND have a surface with tooth to apply it to.  You can make your own, or buy Bonded Marble Gesso from Frank Covino.  Several other companies are emulating Frank and finally beginning to make it also.

Working on a marbled board allows you to scrape, carve, and shape without ruining your surface.  Just remember that this gesso dries very quickly and becomes quite hard (like marble), so whatever your plan is, you should execute it as soon as the gesso is touch dry.  For instance, when I build a muscle, I keep adding coats with an older bristle brush until it’s the thickness I want.  Then, I sand it thoroughly, paying very special attention to the edges, as soon as the gesso will let me.  If you let it cure and come back a couple of days later, you’ll find it nearly impossible to make the edges smooth–it’s just too hard to work at this point.  Remember that paint will not cover up whatever textural accidents or sloppiness you leave.  The texture will still telescope through the paint, so make sure you are thorough with those edges.

All the best,

Marsha

P. S.  Just a note to remind you of the upcoming workshop

Hello, dear readers.  Here is some information I just sent out to all members of The Arizona Renaissance Art Guild, and I would like to share it with you as well.  We are having a one-week workshop where we intensively work on our paintings for one committed week.  If you will be in the Phoenix area on October 7-11, 2013, we would like to invite you to attend and perhaps make some new painting friends.  Respond to this post if you are interested.

Dear Artists:

Great news!  Karen has confirmed the dates for the Arizona Renaissance Art Guild’s one-week workshop. So, are you ready to paint those gorgeous works of art???

It’s PAINTINGPALOOZA time, one whole week to devote to your Classical painting for about $60 – $85 (total for the week), where we artists help each other make our work better and better.

The workshop is scheduled for the week of October 7 – 11, 2013, at the museum.  Workshop hours each day are from 9:00 a.m. until ?.

Signing up is simple–just send us an email and please include your phone number in case we need to contact you.  We have space for a maximum of 12 people. The more people that sign up, the less the cost!

There is no need for you to send a deposit ahead of time: just RSVP via email to confirm your attendance, and then pay your share when you get there.

And as always, if you see someone who didn’t get this email but who should or wants to be on the mailing list, please feel free to forward this on to them and us so that we will be able to include them in our next mailing.

Call if you have any questions.  Looking forward to hearing from you soon,

Karen and Marsha
Arizona Renaissance Art Guild

PART 2, CLASSICAL ACADEMIC APPROACH, THE SUPPORT

You will need a support for your painting, and rather than make it yourself (what I normally do), you may want to go and buy a pre-primed gessoed Masonite  board for expediency. The reasons for a hard support as opposed to canvas are many, not the least of which are longevity, durability, and more control.  If you absolutely need canvas, make sure to choose a fine linen weave on board, rather than on stretcher bars.

You can buy an 18″x24″ Ampersand Gessobord, uncradled 1/8″ flat panel, at Utrecht for about $17.  It is a sealed hardboard panel with an acid free, acrylic gesso ground that you can start using right away.  Or, you can buy Utrecht’s excellent cradled, 18″x24″ unfinished wood panel and gesso it yourself for about the same price.

Buy the best marble-inclusive gesso from Frank Covino.  If you gesso your own, make sure you protect it on the back as well so that it cannot absorb moisture and warp.  To save on the cost of expensive gesso and to give them a clean, fresh finish, I coat the backs of my boards with oil-based Kilz, a fabulous and reasonably priced protectorant/primer/sealer, then apply gesso on the front only.

Decide on the size of board, based on the Old Master work you have chosen.  For example, for most lifesize portraits on a 16″x20″ panel, the figure will end at the armpits.  A size approximating life is best, as a giant head can look grotesque–unless that’s the effect you want to achieve.  Keep in mind the following parameters for face sizes on the panel–smaller than life is fine but these are LIMITS you should not exceed:

babies:  5″ from chin to hairline
children 3-12:  5 1/2″
teens to age 27:  6″ maximum, male or female
adults:  7 1/2 for men with large heads, 6 1/2 for women with large heads

The other item you will need right away is a 9-value (plus black and white) palette–more about that tomorrow.

PART 1, CLASSICAL ACADEMIC APPROACH–GET ARTSERIOUS

Artserious–a linguistic invention–so, it’s time to get artserious, begin at the beginning, and learn the classical academic painting process alluded to in this prior post.

As the Dalai Lama says, “Know the rules well so you can learn to break them effectively.” This is probably one of the most important reasons to have classical training and, although it is best received in person, teacher-student, I hope to help you through some of the same processes online that I teach my private students.  (If you are in the Phoenix Metro and want one-on-one lessons, contact me through this blog.)

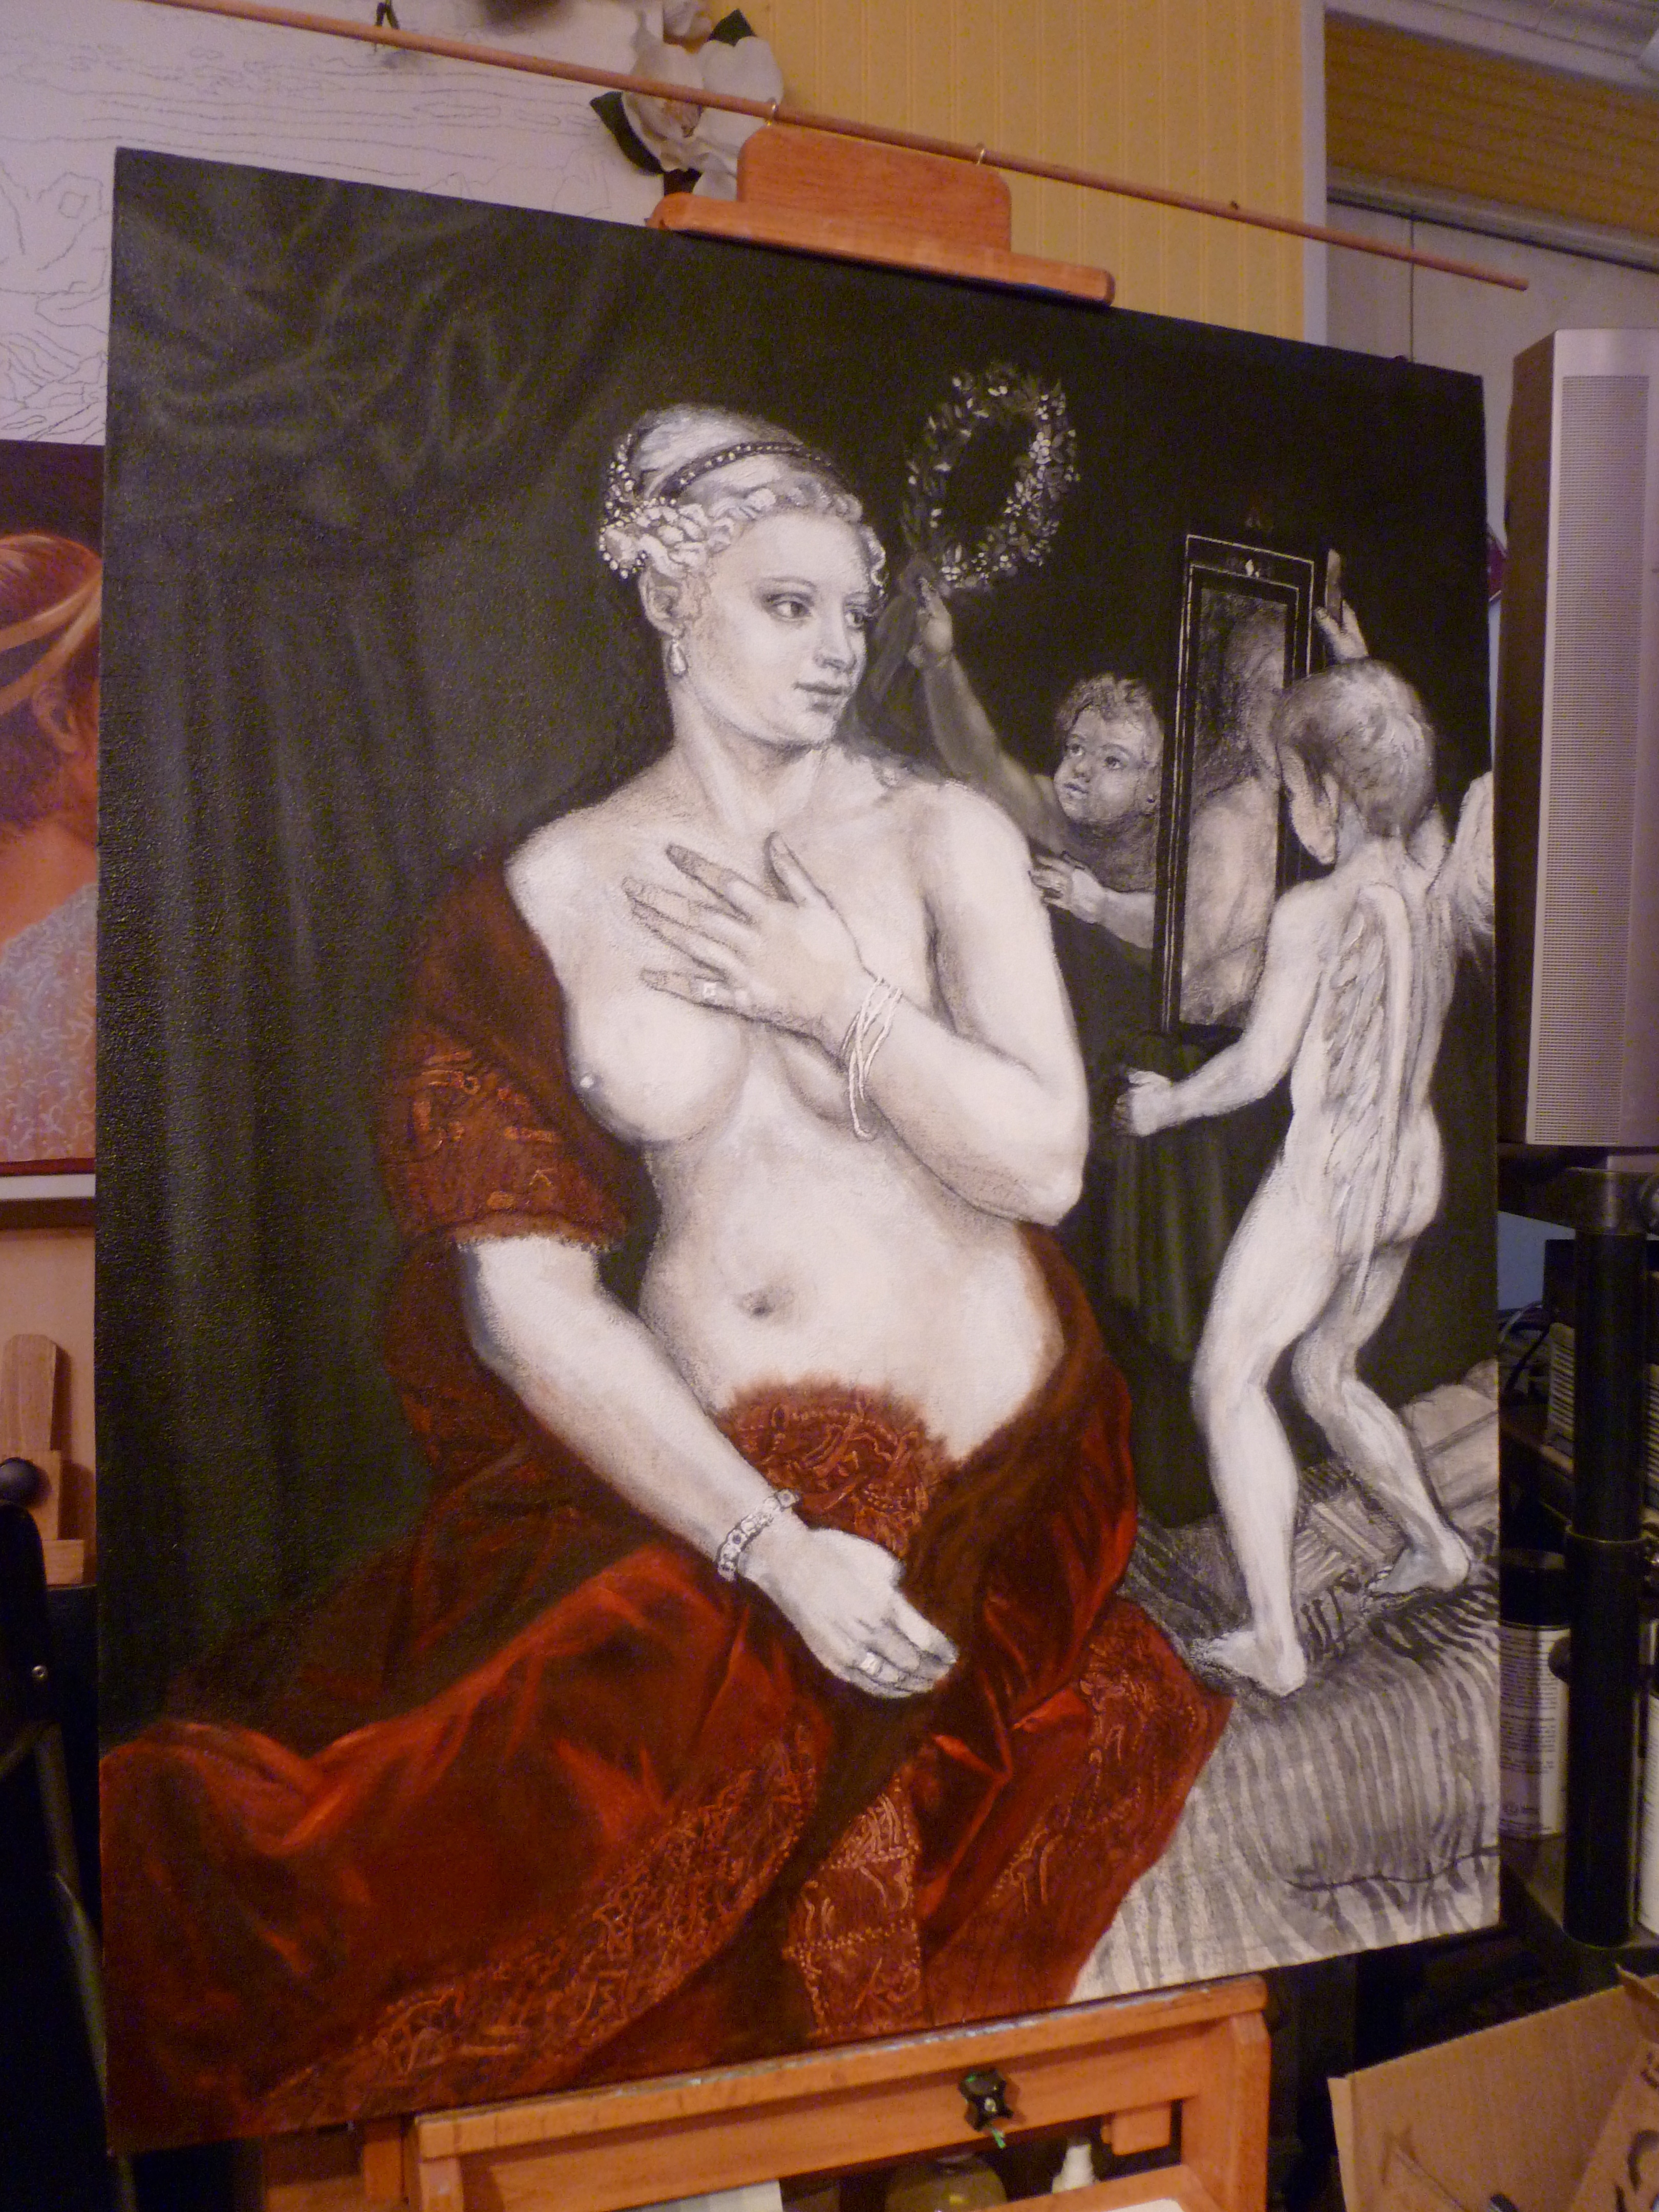
In coming weeks, I will discuss the following: materials, design, compositional unity, applying the Golden Mean, Munsell’s color system and hue, value, and intensity, seven basic color schemes, aerial perspective, the cartoon, accurate enlargement/graphing and transferring to panel, gessoing masonite board, inking the drawing, sculpting with gesso for bas relief, the charcoal study, underpainting, mixing a flesh palette, and colored oil glazes.

It is a lengthy syllabus, but I hope you will profit from the instruction in some way.

Creating fine art is very much a science; therefore, you should come to this training with an open mind and put your previous painting experience on hold for awhile so that you can see with fresh eyes.  This is not quick art, but I promise you that with proper instruction and following the process outlined, along with self-discipline, persistence, and  patience, you can achieve the high degree of quality in your painting you have hoped for.  It is better to spend weeks on one excellent painting that can be considered significant art, than to spend a couple of hurried days on a piece that will end up in the trash.

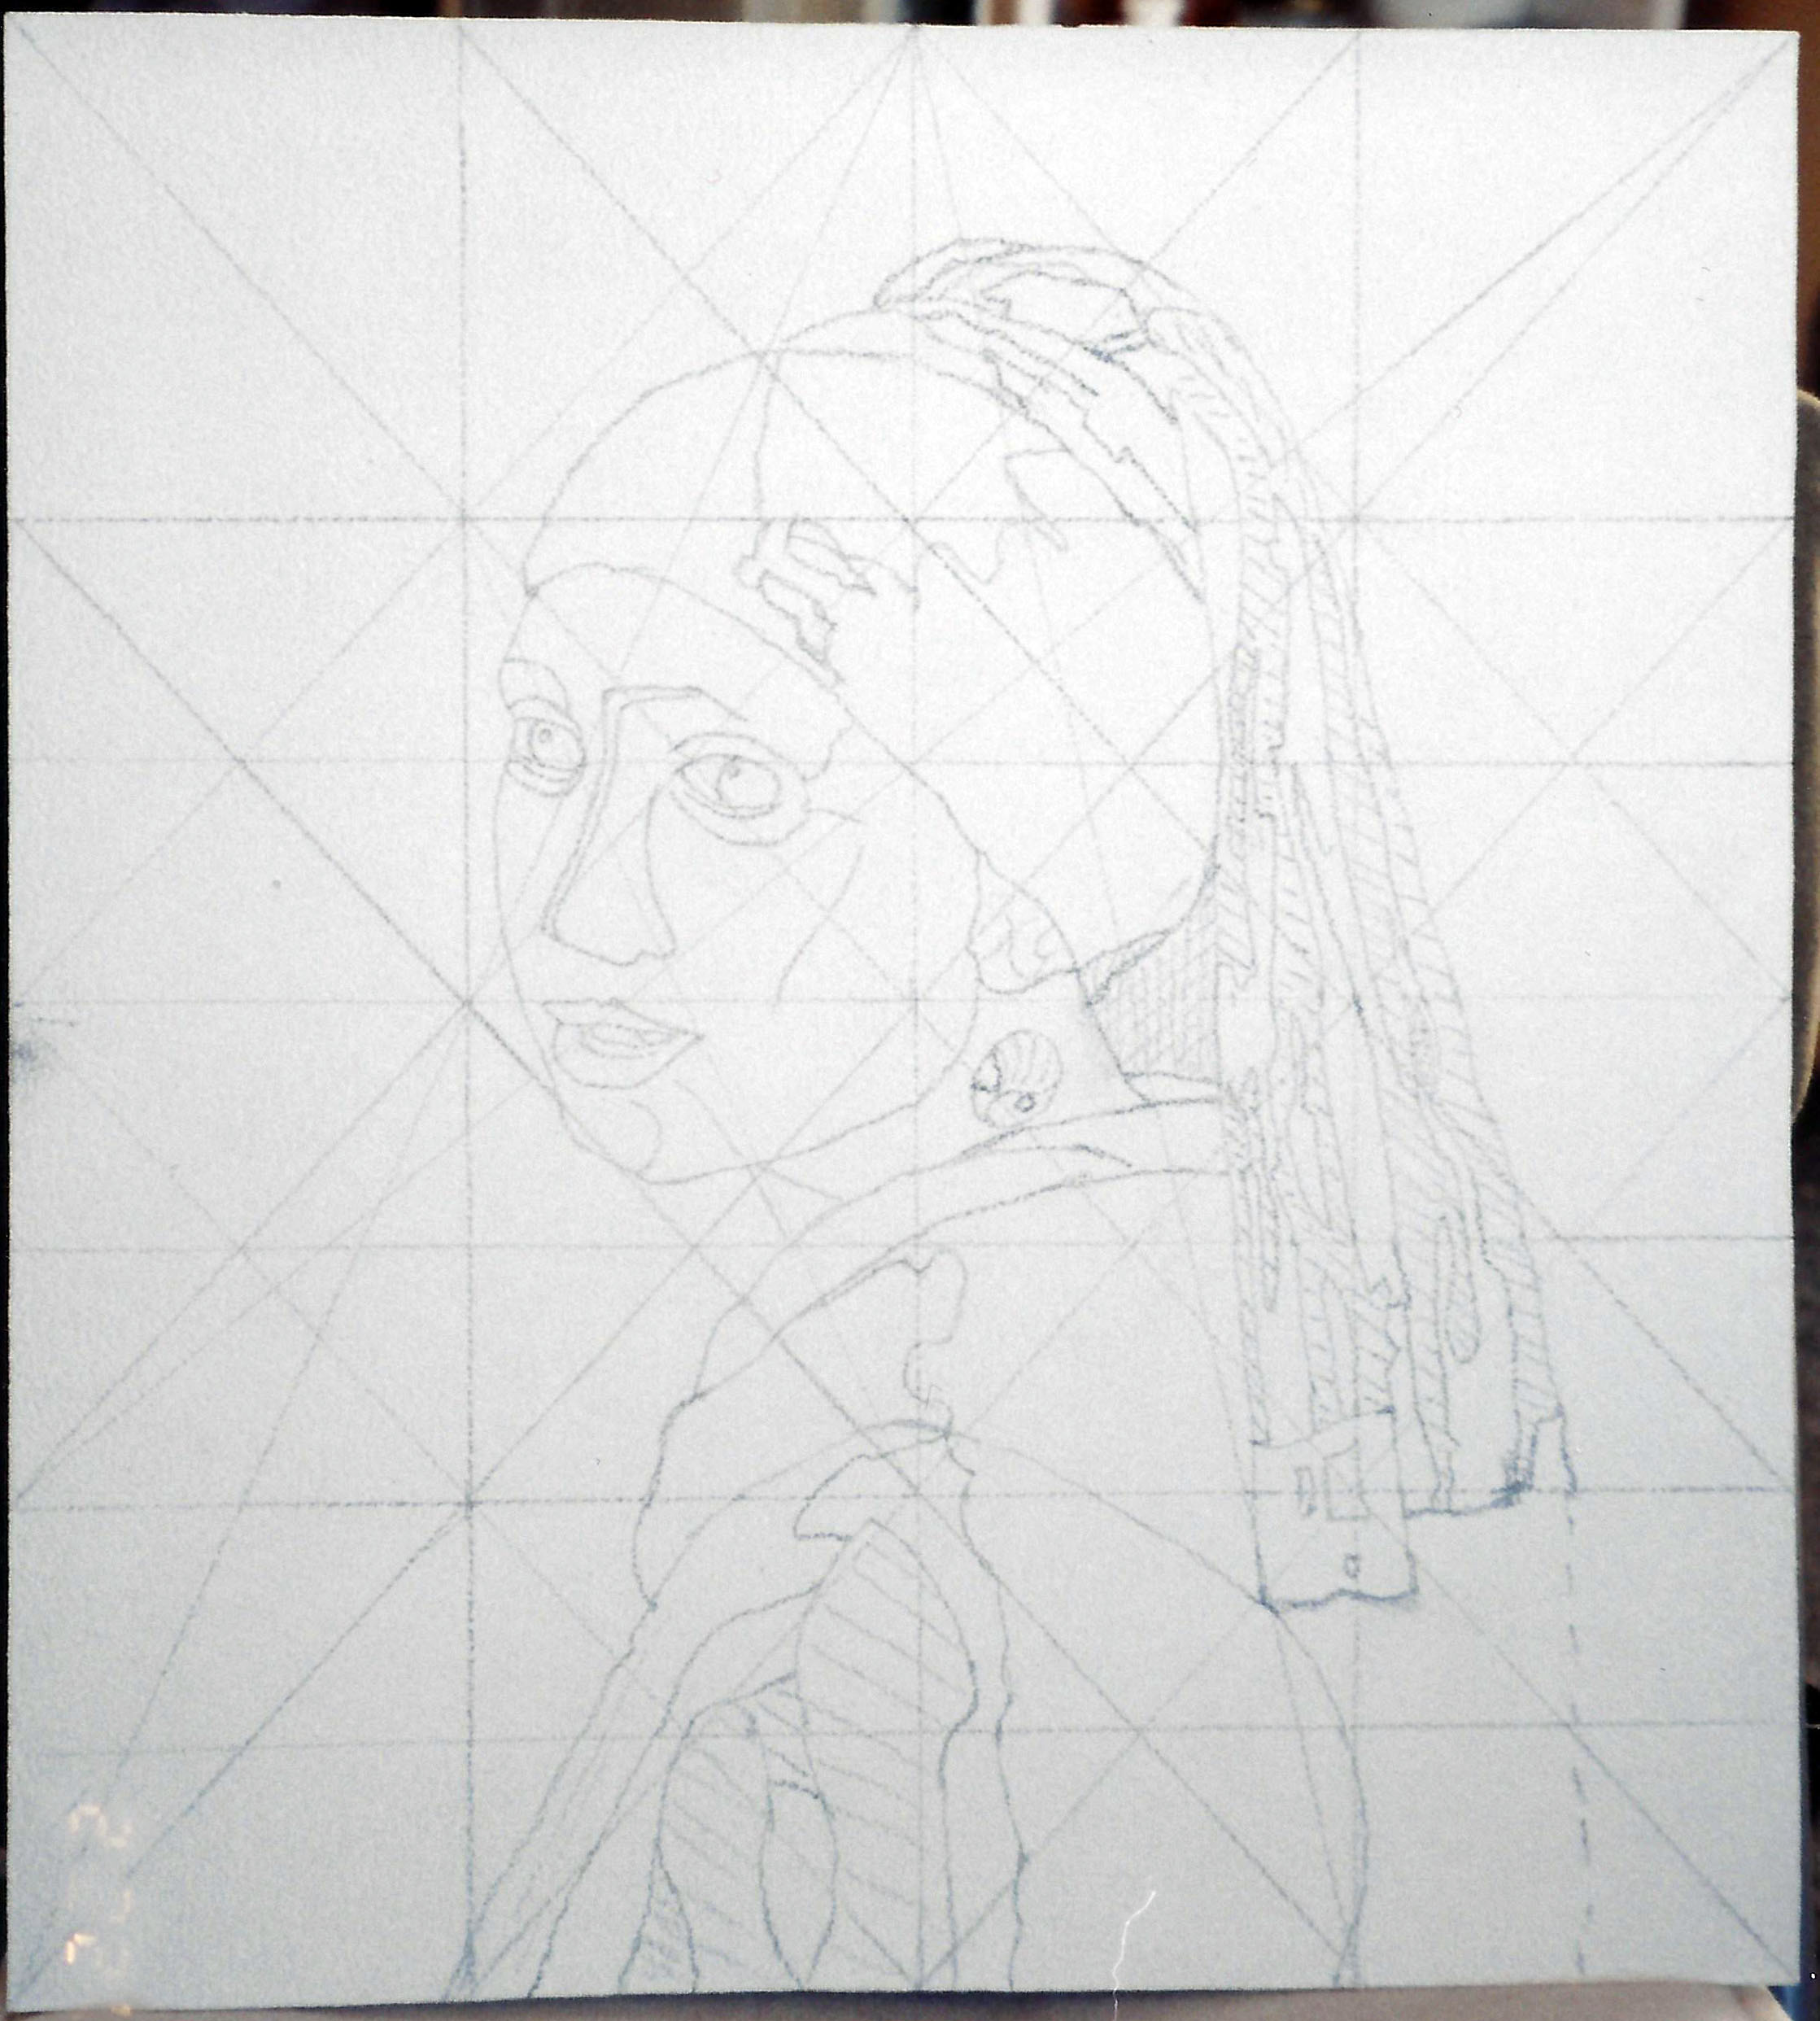
Keep in mind there are preliminaries we will skip for now and come back to later, as I am sure you want to get to the actual creation of a portrait.  Beginning with how to get an accurate drawing, our ultimate purpose here is to get an excellent likeness and end up with a high quality, Renaissance-style classical academic painting that will never find itself in a garage sale.  You will be copying an Old Master oil portrait of your choice–you can paint family AFTER you have learned the basics and “mastered the Masters.”

Your first assignment:  Choose an Old Master portrait that you love.  Keep the goal in mind; you are learning the process here, so you will want to choose a picture that is not too complex, has clearly delineated eyes, nose, mouth, hair, clothing, and a simpler background.

I will be using Vermeer’s Girl with a Pearl Earring.

Make sure your reference is very high resolution, and high quality.  Two superb online sources are the Getty Museum or Art Renewal Center.  You should never undermine your efforts by beginning with inferior reference, as I have seen students who, despite admonition, try this and give up in frustration.

Print the reference on glossy photo paper, as it shows detail much better than other surfaces.  Print one in grayscale and one in color, ledger size if possible, otherwise 8 1/2″ x 11″.  You can put them on a flash drive or CD and have it printed at FedX or any print shop.  It is helpful to save the references on your computer desktop as well, for quick access.  I use my computer to enlarge certain small areas as I go along and need to get a closer look.  The computer, however, will not replace your printouts in this process.

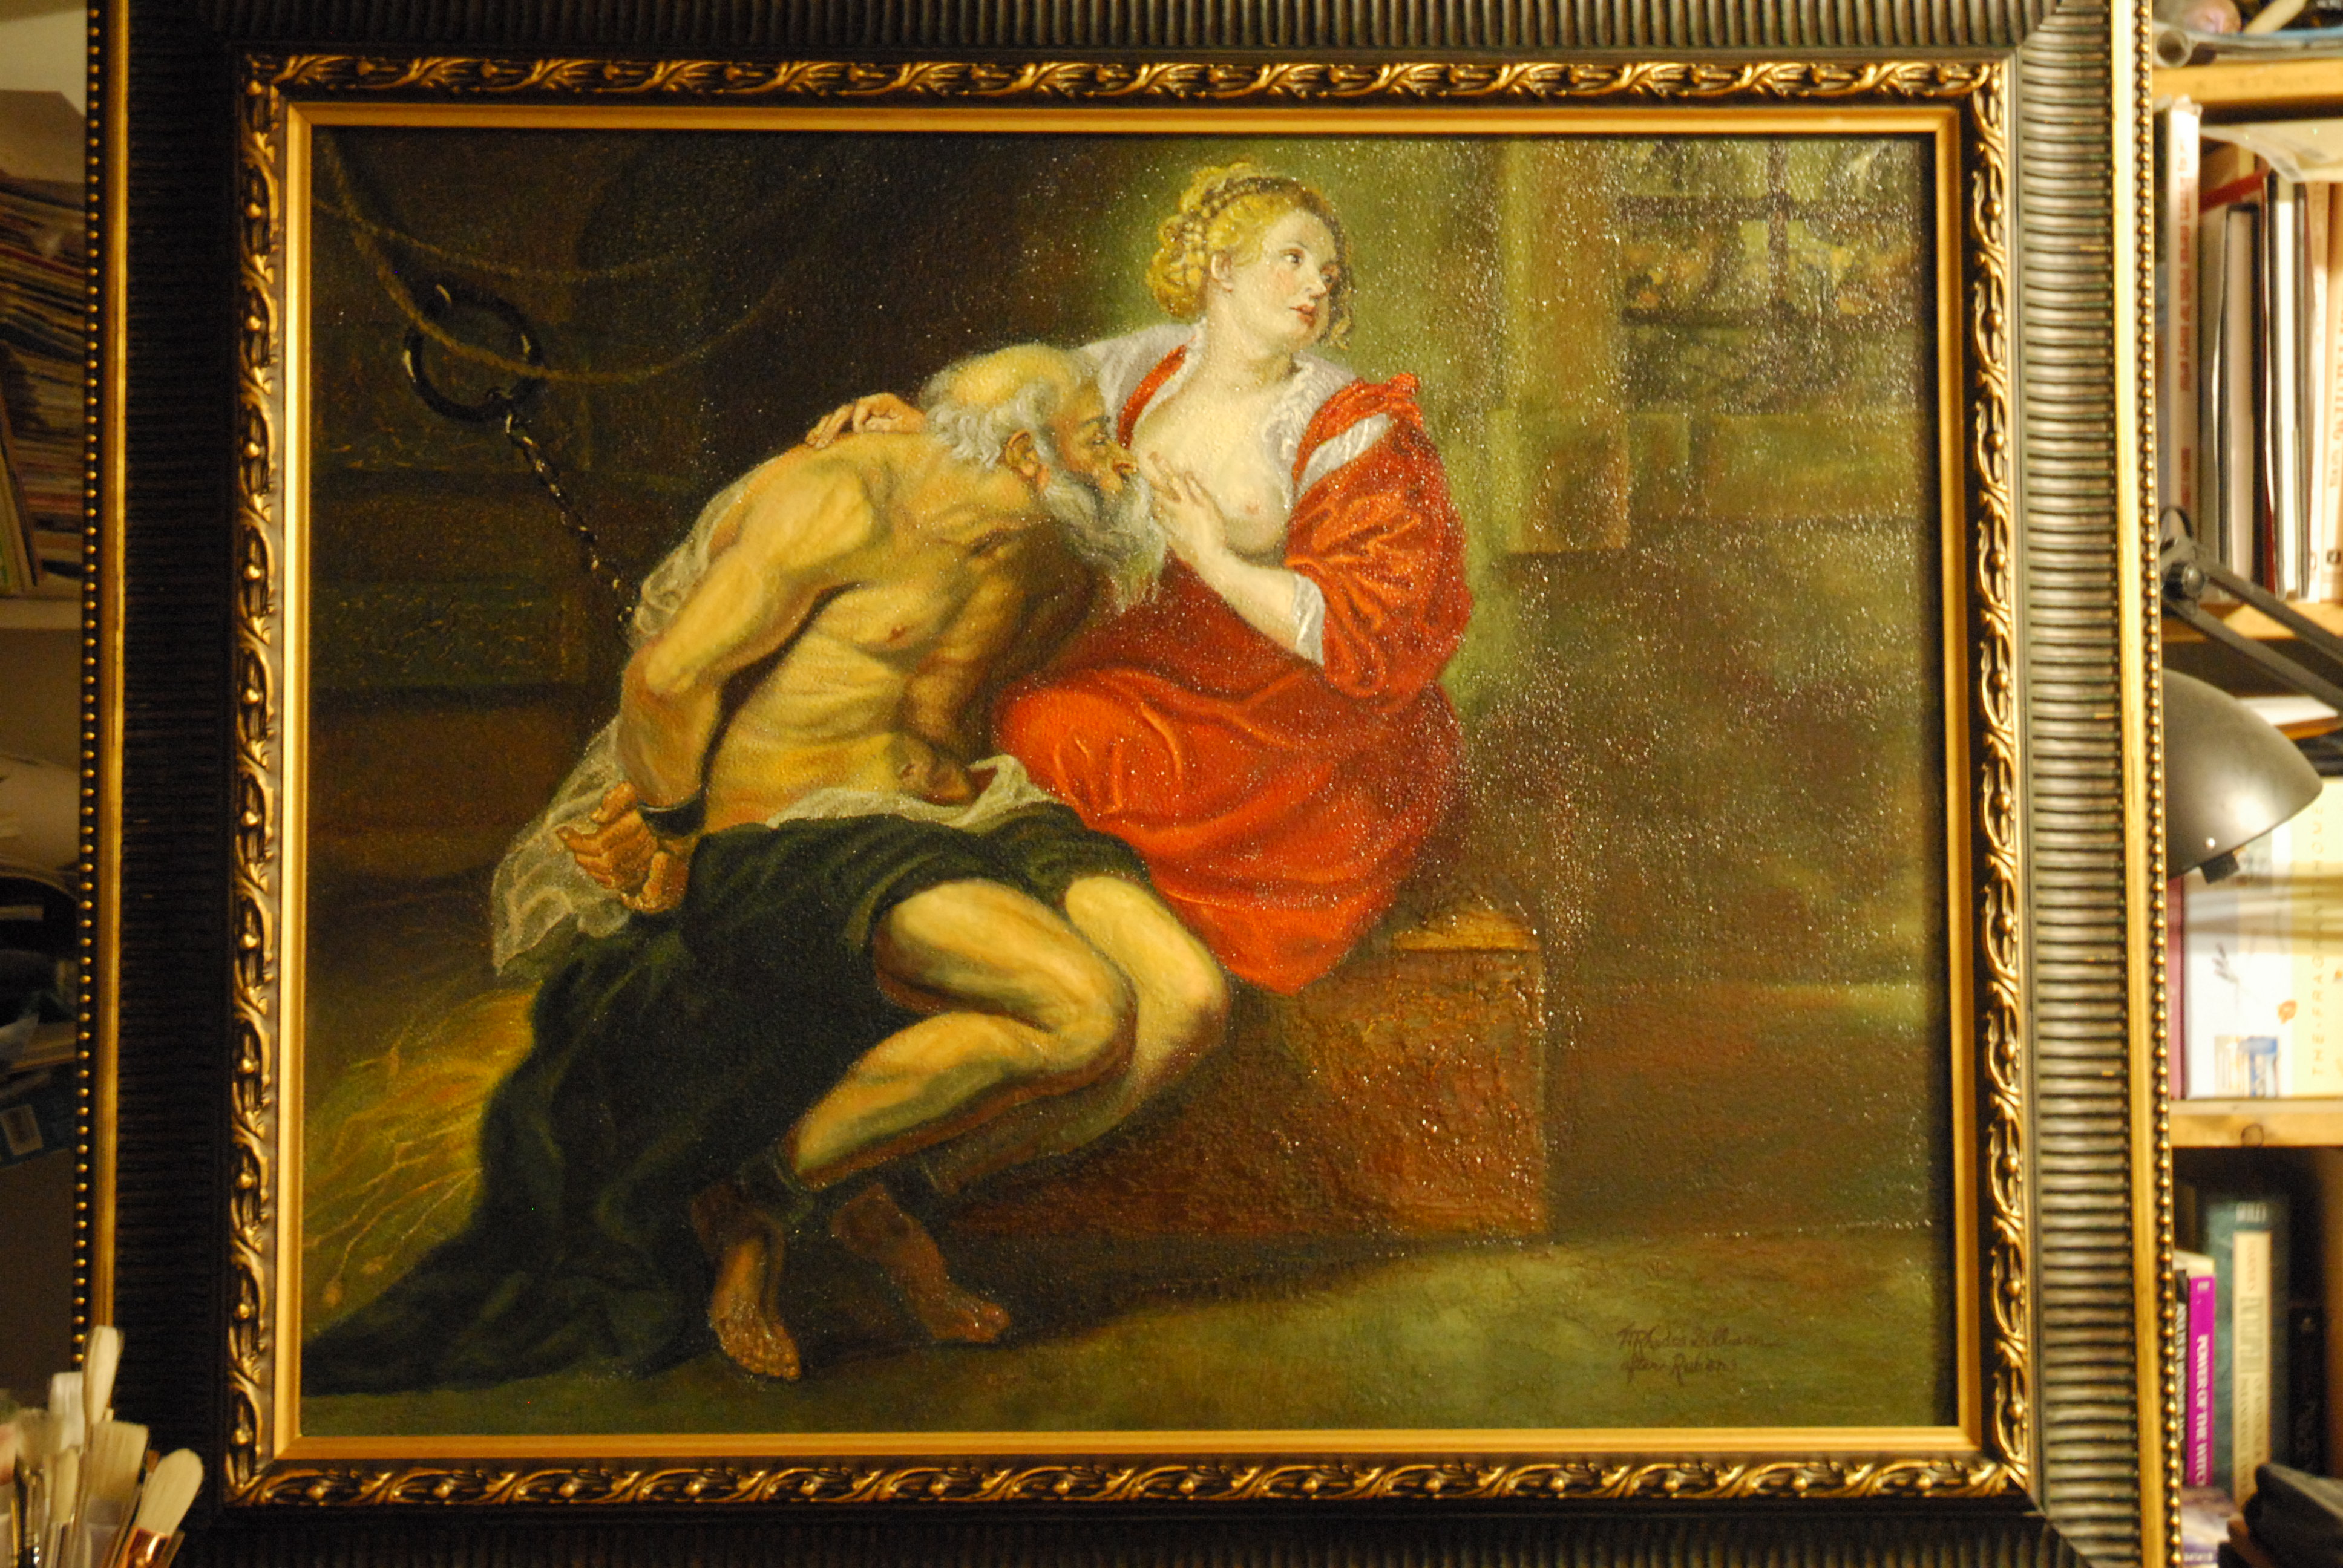
Some Masters to consider for our purposes are (in no particular order):  Titian, Caravaggio, Rubens, Rembrandt, Velasquez, David, Vermeer, Gerome, Godward, Leighton, Alma-Tadema, and Bouguereau are all excellent artists from which to learn, although there are so many more.

GeromeBlackBashi-Bazouk1869-26x32
Jean Leon Gerome, Black Bashi-bazouk, 1869, 26×32″

TitianFlora1515-22x31
Titian, Flora, 1515

Here are the materials you will need for the process:

Oil Painting Materials:
references
pens/pencils
extra-fine permanent markers(Sharpies), black, blue, green, red
acetate
General’s charcoal pencils
vine charcoal
blending stumps (tortillions)
metal yardstick
metal 18” ruler
transparent triangle, 18”
kneaded eraser
India ink and liner sable brush
spray workable fixative
Exacto knife
clear tape
artist’s white tape
Golden acrylic matte medium
Masonite or hardwood board
sandpaper very rough #40-60, very smooth #100-200
natural sponge
Knox Gelatin
paint roller for application of gesso
retouch varnish
Liquin
turpentine for brush cleaning
olive oil for brushes, cleaning hands, oiling palette
leak proof turpentine container
easel
plastic wrap
blue paper towels
mahl stick
notebook
palette knives

Brushes:
bright sable #2, 4, 10
flat bristle #2, 4, 10
round sable #1, 8
round bristle #0, 8
mongoose flat #6
mongoose round #0
mongoose filbert #4, 8

Paint:
*titanium white
*flake white
ivory black
mars black
chromium oxide green
pthalo blue
cadmium yellow light
yellow ochre
raw sienna
raw umber
cadmium orange
burnt sienna
burnt umber
cadmium red light
alizarin crimson permanent
cobalt violet
ultramarine violet
French ultramarine blue
cobalt blue
cerulean blue
viridian green
Shiva cadmium green
Grumbacher pthalo yellow green
Winsor and Newton Winsor orange
Indian yellow
napthol red light

*Avoid zinc white (PW4) whenever possible. It is often added to paint colors one would not suspect, such as in titanium white, lead white, and to various other colors to render them more transparent. It is also used as a filler to make them less expensive to manufacture.  Zinc white can make your paintings crack, according to extensive, lengthy studies done with conservators at the National Gallery of Art, Washington.

Also, buy the best quality paint you can afford, as student grade and many professional grades contain excessive aluminum stearate that causes darkening of the paint film over time.  Good commercial brands include professional grades of Utrecht, Williamsburg (both made in the U.S.), Old Holland (Netherlands), and Sennelier (France).  I like the unique textures of handmade paints as well, and buy from colormen like Robert Doak, Michael Harding, and Natural Pigments.

*marble-inclusive gesso
*values palette
*homemade medium

In the next post, we’ll discuss supports, marble-inclusive gesso, and the 9-value (+black and white) palette you will need.

ARCHIVAL, SOLVENT-FREE PAINT LIFE, STAGE 3

I have just completed stage 3 of the sun/stand oil referred to in previous posts (see stages 1 and 2). I had to wait longer than I thought, and just beat the monsoons. We had a dust storm yesterday and about three drops of rain, but I had brought my oil inside by that time. It took three weeks in 112-117 degrees (Can you say “hot?”) instead of the two weeks I anticipated to get the desired thickness.

Remember that linseed oil starts to degrade and break down at about 350 degrees F, and art supply linseed/stand oil is heated to as much as 470 degrees F for expediency, making it a very slow drying oil. My oil might have made it to 120 degrees maximum and the oil traces beautifully, will dry quickly in my artwork, and has the viscosity of warm honey:

StandOilDrip

At first, I thought a funnel would be necessary to get it into my small-mouth bottle, so I lined one with a small Ziplock sandwich bag (corner snipped off), to keep the sticky oil from ruining my funnel:

FunnelStandOil

It turns out that the lip on my bowl poured in a beautiful, dribble-less stream, so I was able to dispense with the funnel idea. I simply poured the new stand oil back into its original linseed oil bottle, using a Q-tip to drag the last of the stand oil out of the bowl and into the bottle–I didn’t want to waste any of the good stuff. I ended up with the bottle half full of good medium after filtering out the moisture and impurities during the prior stages of the refining process.

I can tell you that this oil will do its job extremely well as a binder–I had a very hard time trying to clean it out of the bowl. I first tried olive oil, and then a Scotch Brite scrubber. Neither would budge its strength around the oil line where it had been sitting for weeks. Finally, I soaked the bowl in very hot soapy water and then scraped it off easily with a single-edge razor blade.

You could stop right here with this process and be happy with conventionally using your lovely, perfectly refined stand oil, an “unobtanium” at any art supplier; OR, you can continue with me on the path of adding marble dust, making glair, etc., a process I will be outlining in additional posts.

A great price on “art supplies” like alcohol, nitril gloves, and petroleum jelly can be found at Masune First Aid and Safety, www.masune.com.  An excellent price on a  box of 100, individually wrapped single-edge razor blades can be found on Amazon, http://www.amazon.com/American-Safety-Razor-66-0089-disp-100-Pack/dp/B000KKMY5O/ref=pd_sim_sbs_hi_1

Until next time…

The Arizona Renaissance Art Guild does one-week workshop intensives three times per year, and in addition, we get together to paint all day on the third Saturday of every month.  If you are in the Phoenix Metro area and are interested in finding out more or possibly joining our colony, please let me know through this blog.  ~Marsha

ARCHIVAL, SOLVENT-FREE PAINT LIFE, STAGE 2

Greetings.  I have returned to my blog after much jumping through hoops to upgrade our Internet service, a task that is not always so easy when you live outside a metro, have no access to wireless, and need to climb a mountain and run wire (in conduit so the animals don’t eat it) to receive a signal.  But here I am at last, and my husband and I are very happy to have a new and faster service!

See my first post on this topic, “Archival, Solvent-free…,” dated 5/14/13, where I had experimented with making my own stand oil (Stage 1) by cleaning the mucilage out of it first, from the directions given in Louis Velasquez’s book. My only regret so far is that I did not start with TWO bottles of flaxseed oil instead of just one.  It is now a beautiful linseed oil and I would like to save some of it in it’s present state but, if I do that, I won’t have enough to make very much stand oil (Rewind would be so wonderful).

English: Flax The seeds of flax are used to ma...

English: Flax The seeds of flax are used to make linseed oil. (Photo credit: Wikipedia)

In this post, I put it in the Arizona sun (Stage 2), using Velasquez’s method, to make stand oil that is a faster-drying oil than can be purchased at art supply stores. The commercial stand oil in art stores has been overheated and, as a result, becomes slow-drying.

I expect that, at 108 degrees with less than 10% relative humidity, my oil will not even take two weeks–but we’ll see.  I must do it now to beat the monsoons that usually arrive in early July, because water would be an enemy of this oil.  Here is the process:

Sun-Thicken the Oil to make Stand Oil (aka Sun Oil)

1.  Pour cleansed linseed oil into a white, opaque container to ¾-1” depth (not shallower, or the resulting stand oil will wrinkle the paint badly), NO WATER contamination. Set the dish inside a perimeter of ant powder, if necessary.  I found out the hard way during Stage 1, that some kinds of ants LOVE this oil with a fervor you wouldn’t believe until you’ve see it!

P1070781

2.  Cover to keep out most detritus but leave gap/clearance allowing air circulation—I layered a piece of breathable organza to keep out even the teeny bugs, some screen and then put the lid on partially.  The screen seems to hold the lid up enough, especially with the lid canted.

P1070782P1070783P1070785

3.  Expose oil to direct summer sun as much as possible, stirring briskly for about 30 seconds, twice daily, more frequently in very hot, dry areas.  Stirring aids in the even and complete oxidation of the oil.  I am guessing I’ll have to stir mine twice as often with something small that doesn’t waste too much oil left on the stirrer.

4.  After 15-30 days, depending on location and season, it will thicken, the hotter and dryer the weather, the faster.  Let it thicken to the viscosity you prefer.  The only rule is don’t let it get so thick that it forms a skin or globs that resist stirring.

5.  With a funnel and a cotton ball, filter the oil of dust/insects. It should be clear, palest yellow.  Place a loose cap on the jar as it expands and contracts when in storage as it continues to dry.

6.  IMMEDIATELY CLEAN THE WHITE DISH, using non-solvent thin linseed oil or olive oil to remove the sticky sun oil, wipe, then wash with soapy water. If you fail to do this, it will not come off and you’ll be discarding your otherwise perfectly good and useable dish.

After my Stand Oil is done (hopefully in two weeks), we will continue on to Stage 3 of the process of making what promises to be a most wonderful medium.

The Arizona Renaissance Art Guild does one-week workshop intensives three times per year, and in addition, we get together to paint all day on the third Saturday of every month.  If you are in the Phoenix Metro area and are interested in finding out more or possibly joining our colony, please let me know through this blog.  ~Marsha