The other item you will need right away is a 9-value (+black and white) palette. 12″x24″ is the most useable size. Any smaller and you won’t have enough mixing room; any larger and it gets cumbersome and harder to reach over it. Making this yourself is an excellent learning experience and begins to train your eye to see nine values in 10% increments, plus black being the absence of light on one end, and white being the absence of dark on the other end (based on the Munsell system). You will have eleven value strips total.
Frank Covino created this and he calls it the “Controlled Palette.” As of this writing, I don’t know if he still sells it. A couple of years ago, he began making it smaller than the one I bought (and love) from him nearly ten years ago, and now I see on his site that it seems to be all a 5th-value gray, similar to Richeson’s Grey Matters palette paper (another excellent tool to provide that extra paint mixing space you sometimes need). I suggest you contact Frank if you would prefer to buy a palette that is ready to use. If you find that it is now indeed all gray, I strongly advise you to make it yourself instead. Your acuity for values will be considerably heightened and, in the long run, you will become a much stronger artist for it.
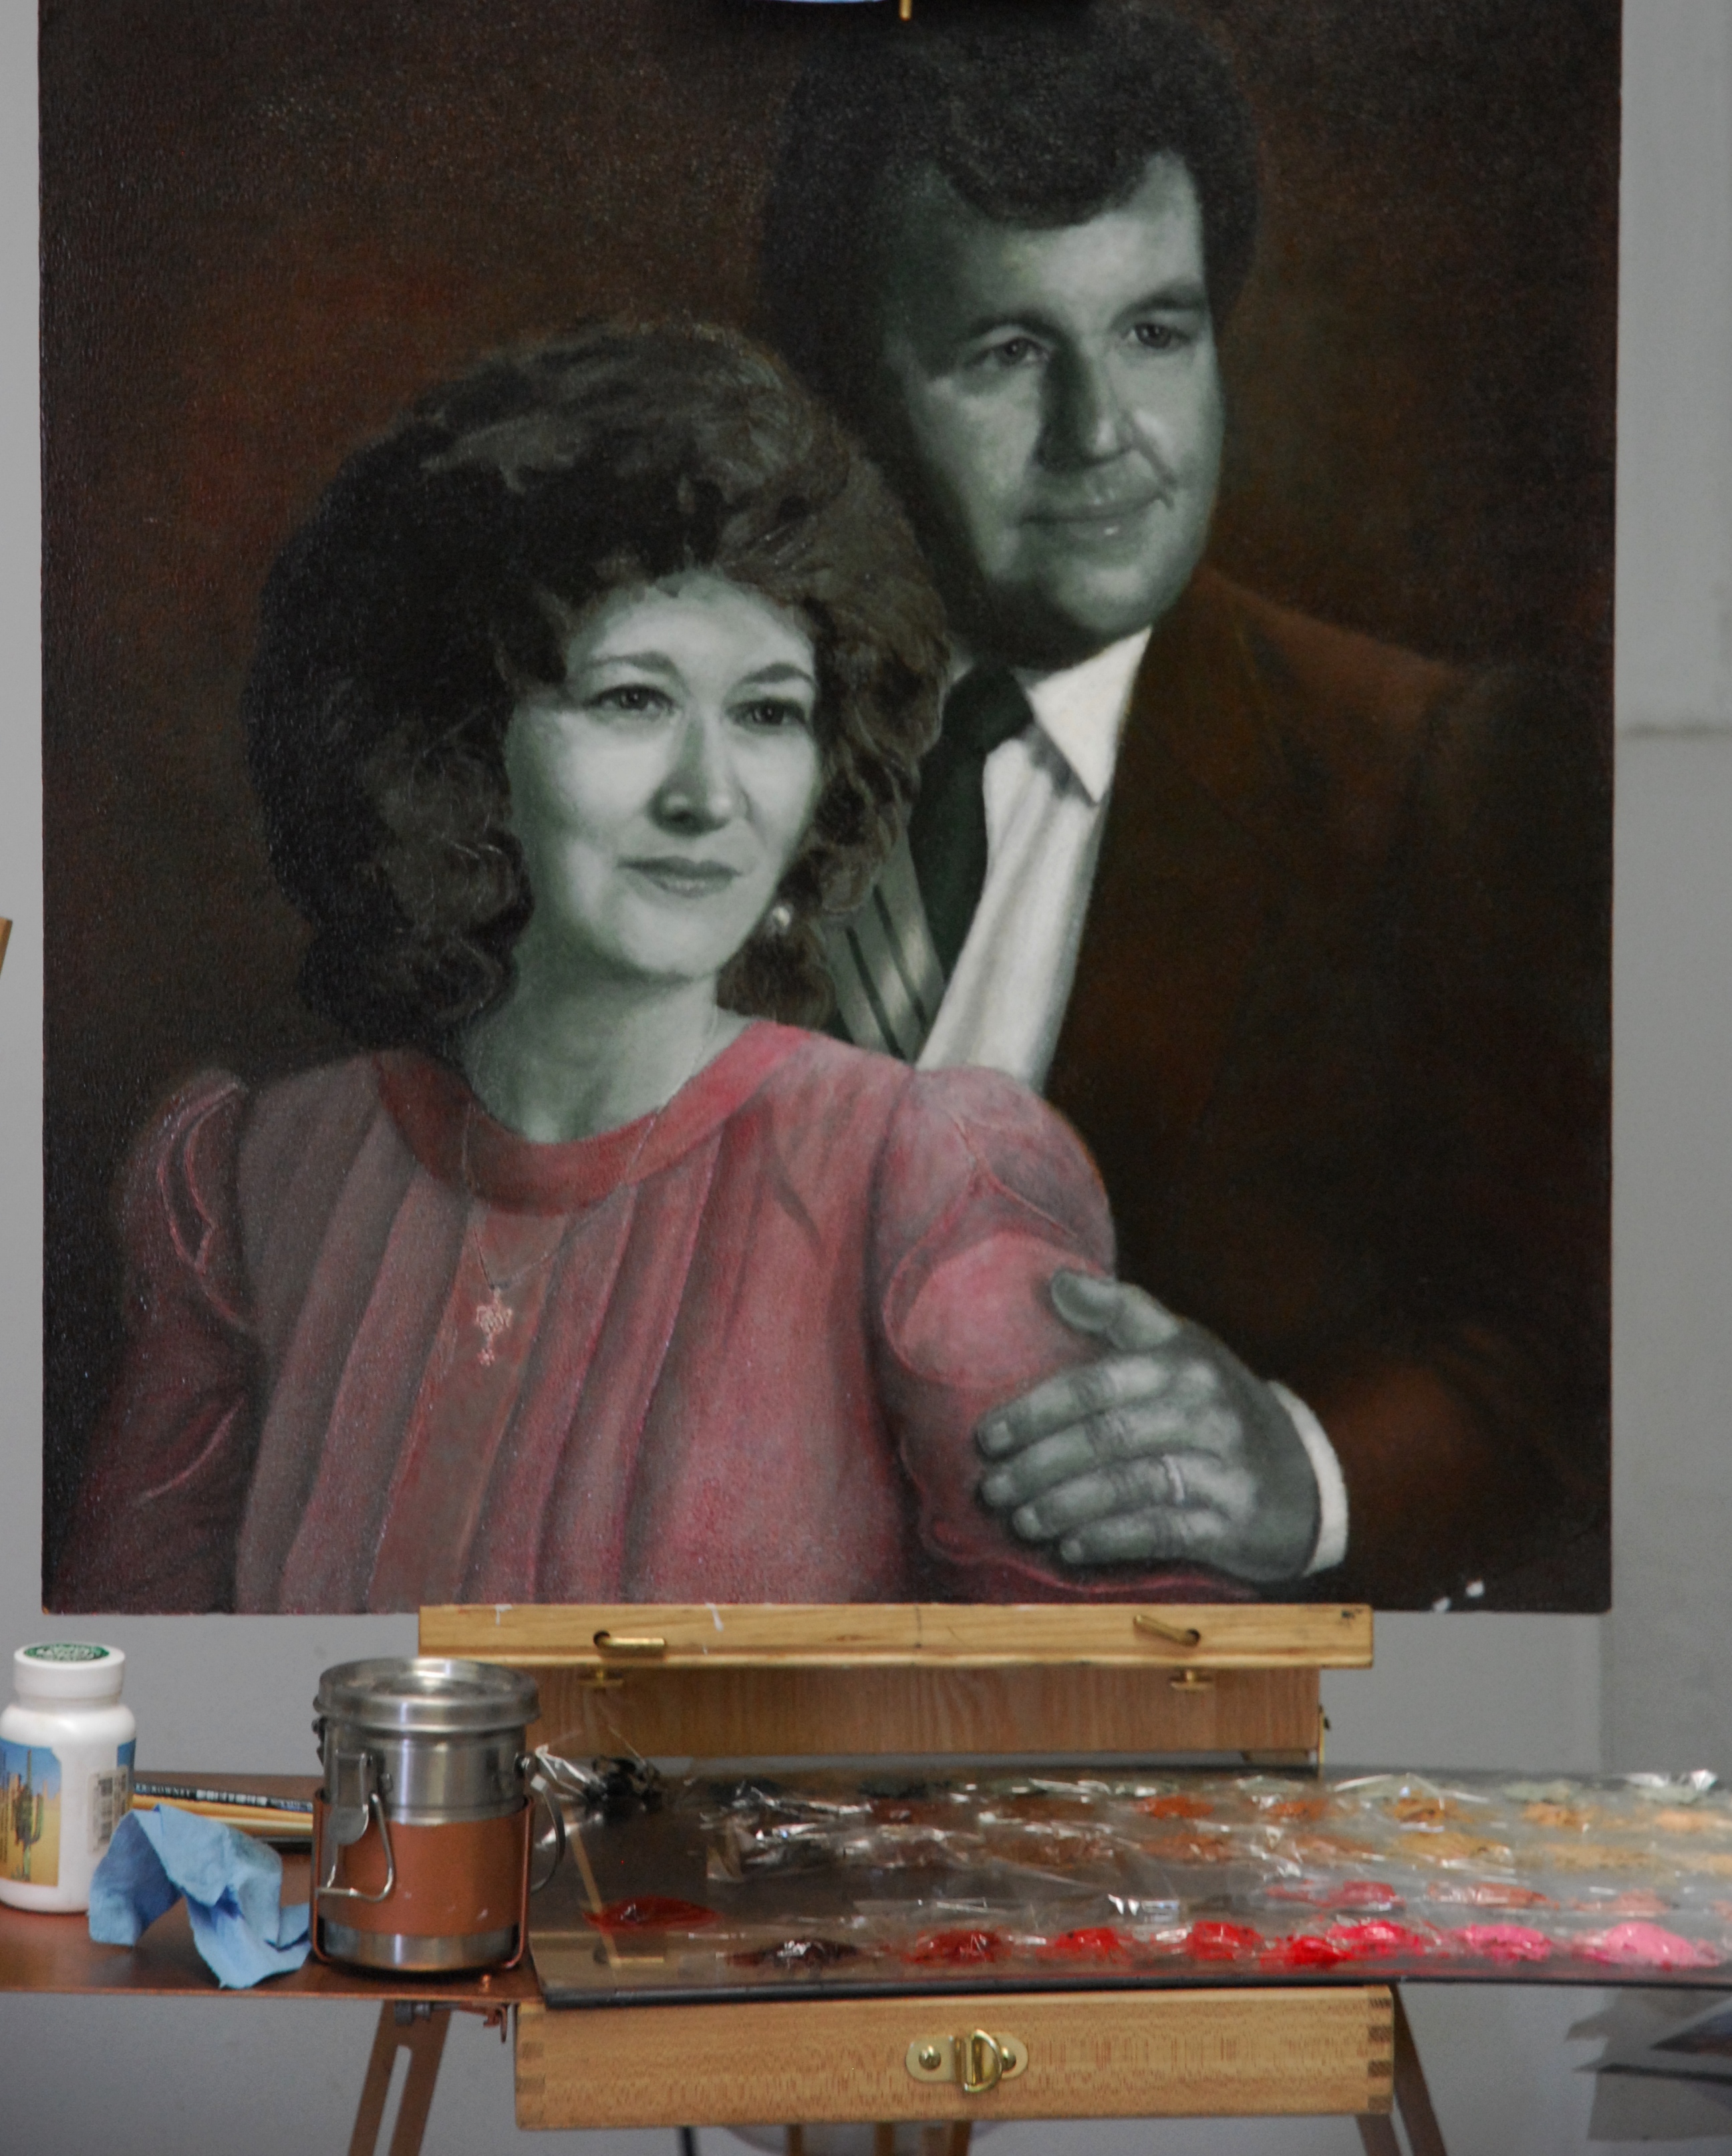
Here is my palette in use. I still have Saran Wrap (the most non-permeable brand–I have tested this) over the colors. The flesh is still in verdaccio, since it’s always best to remember that “what surrounds the form affects your perception of the form’s values”:
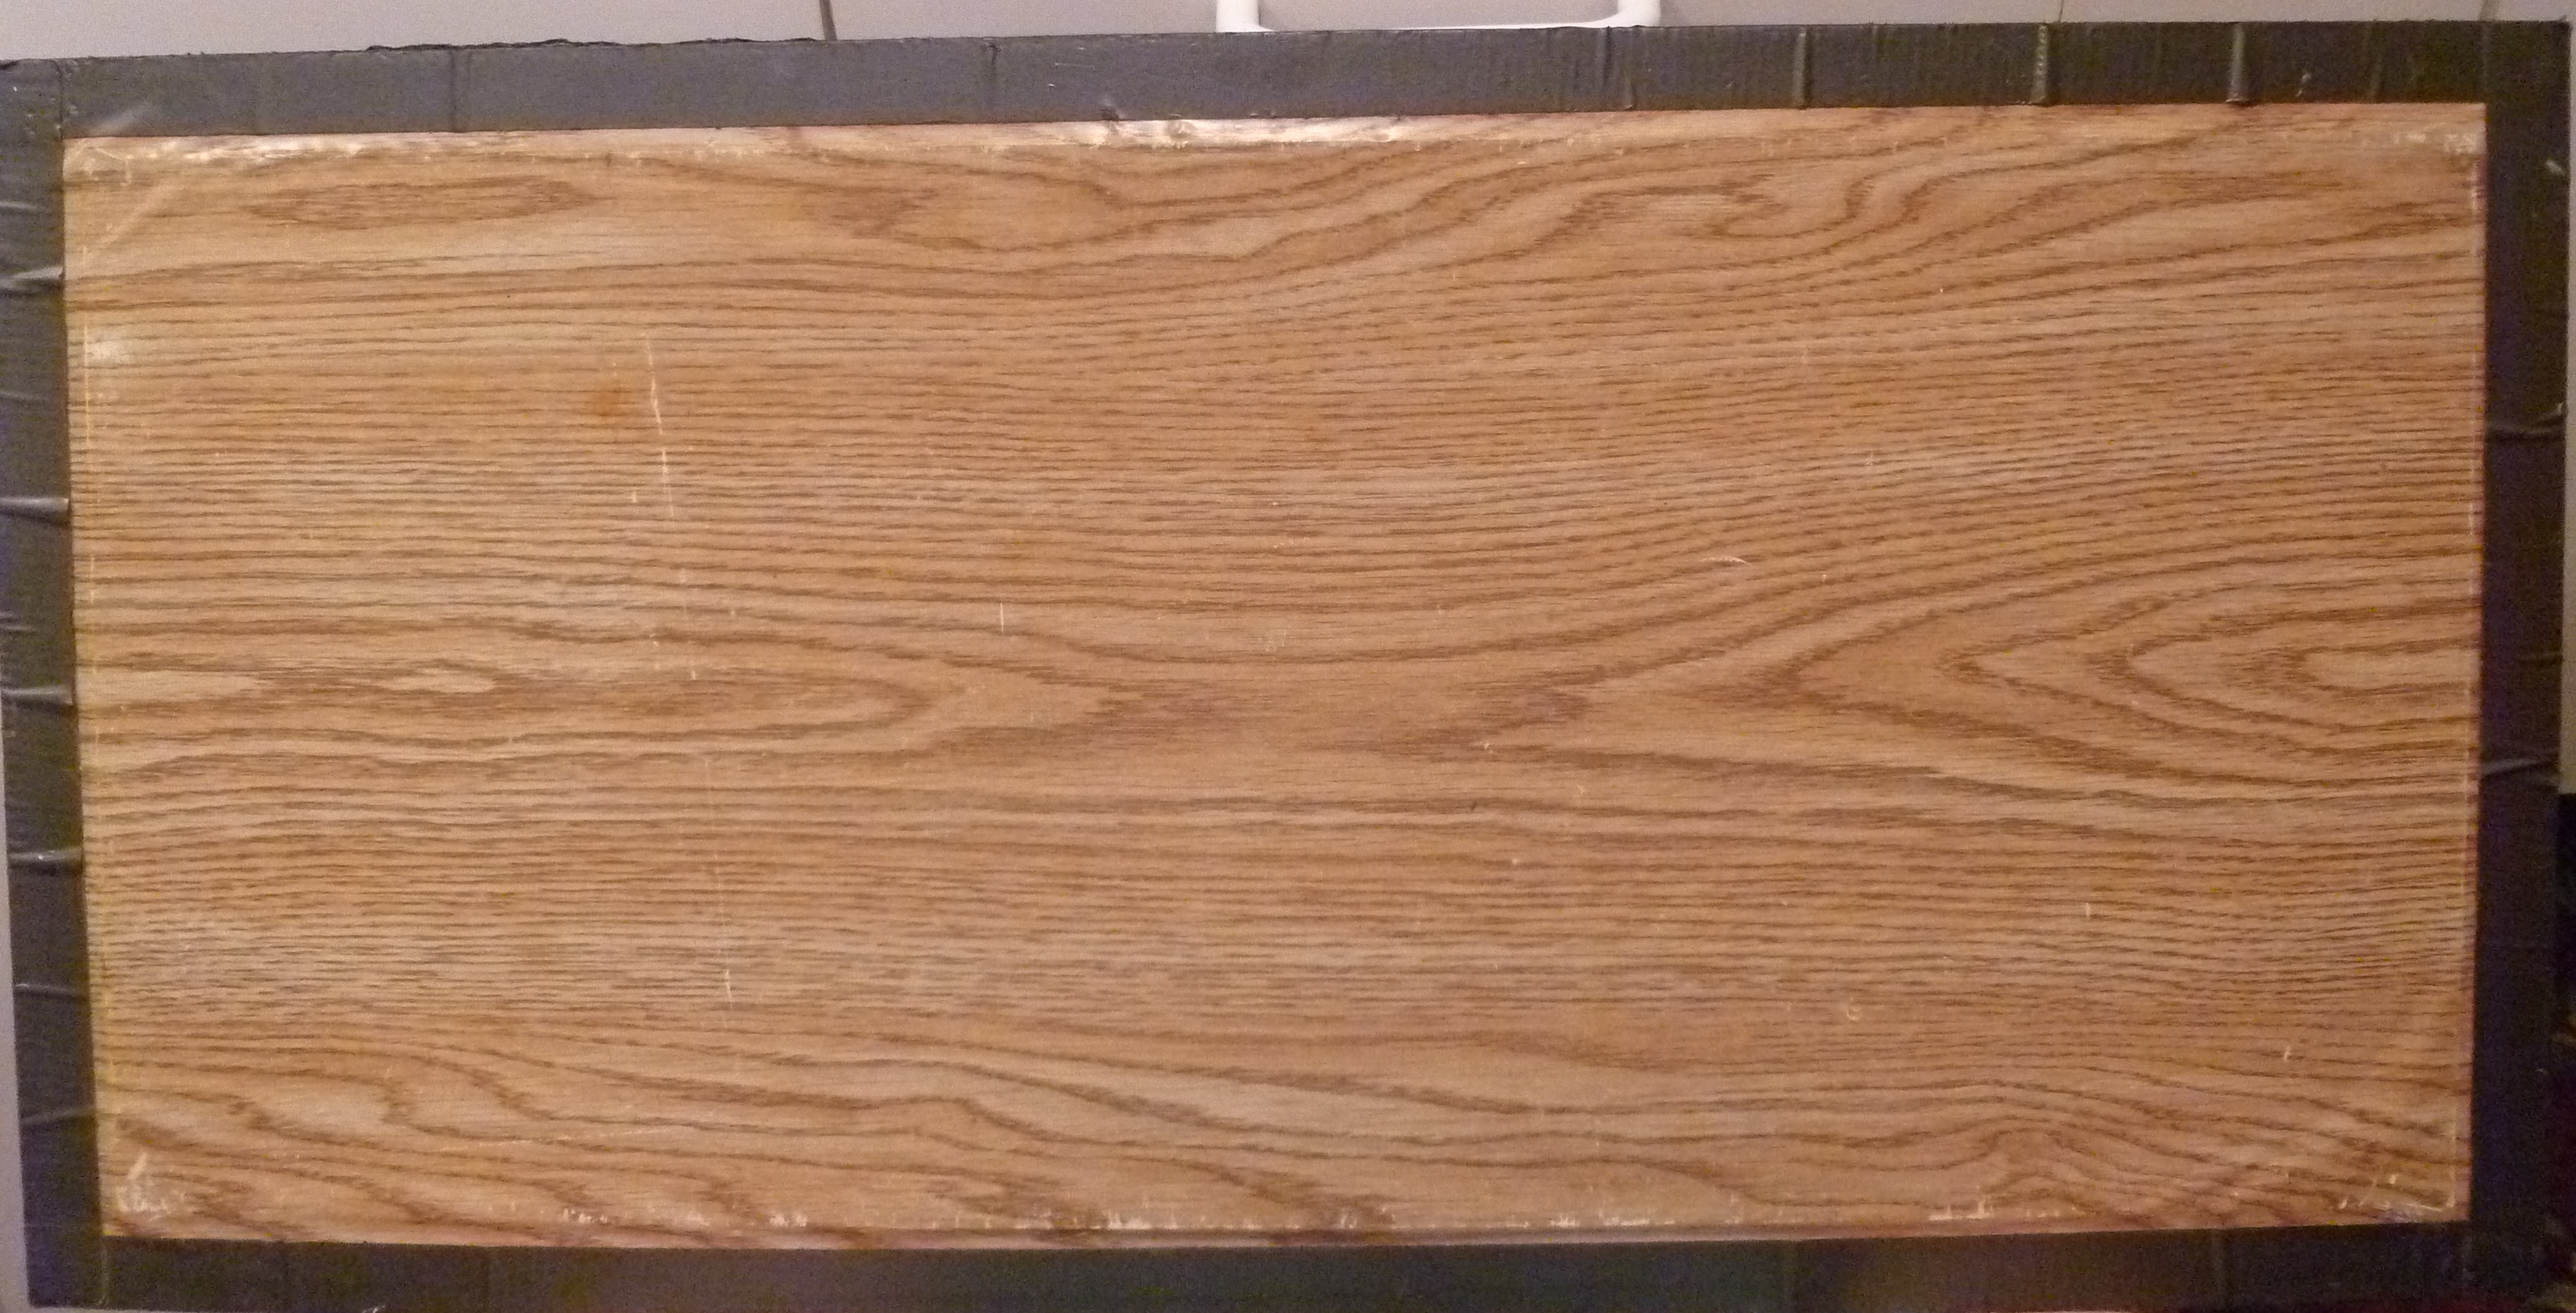
Here is what it looks like:

Front
Back
You can print this value scale for reference. Remember, there is a white strip to include at the right end:

Supplies needed (all available at Home Depot, Lowes, Ace, etc.):
2 pieces 12″x24″ thin Plexiglas–glass is better for scraping or cleaning if you’re not going to be traveling with it.
1 piece 12″x24″ 1/8″ Masonite
6′ length of 2″ wide gray Duct tape
1 piece of 12″x24″ Contact paper of your choice (wood grain shown)
1 12″x24″printed or painted value scale on lightweight card stock, not paper
Coat one side of Masonite with contact paper, then assemble “sandwich” from the bottom, up, as follows: 3. Masonite (Contact paper on underside), 2. value scale, face up, 1. 1 piece of Plexiglas (or glass) to cover. Duct tape edges with half the tape width showing on top and half on bottom, long edges first, short edges last. Palette is complete. The extra piece of Plexiglas is used on top of the palette to mix paint on and keep the actual palette clean. When you use it, make sure to very lightly rub it with olive oil before you put the paint on, thereby making it easier to clean. When the top gets scratched and mangled after many uses, just toss it and get a new top to go over your palette.
Test the measurements of this palette before you make it to ensure it fits in your freezer (adjust, if needed), as that is the way to store your paint for as much as six months. This saves money because when you mix a flesh palette, for example, you can just use the remaining paint for another portrait.
All the best,
Marsha
